


Today’s recipe is for traditional Korean jjinppang: fluffy steamed buns filled with red beans. I shared a similar recipe a long time ago for steamed fluffy buns filled with vegetables and meat called jjinppang-mandu. My jjinppang mandu recipe has been used by many of my readers over years and the video has been popular too, even though it was filmed before I had an HD camera and looks kind of blurry.
Hot and fluffy steamy jjinppang is irresistible! They are soft on the outside with chunky sweet red bean paste in the middle, great for a dessert or snack, or even a light meal.
One key to this recipe is to leave some chunky bits of the red beans and skins in the filling so it has a bit of a rough, homemade texture.
I hope you and your family enjoy this recipe for a long time, just like my jjinppang-mandu recipe!
Ingredients
For sweet red bean filling:
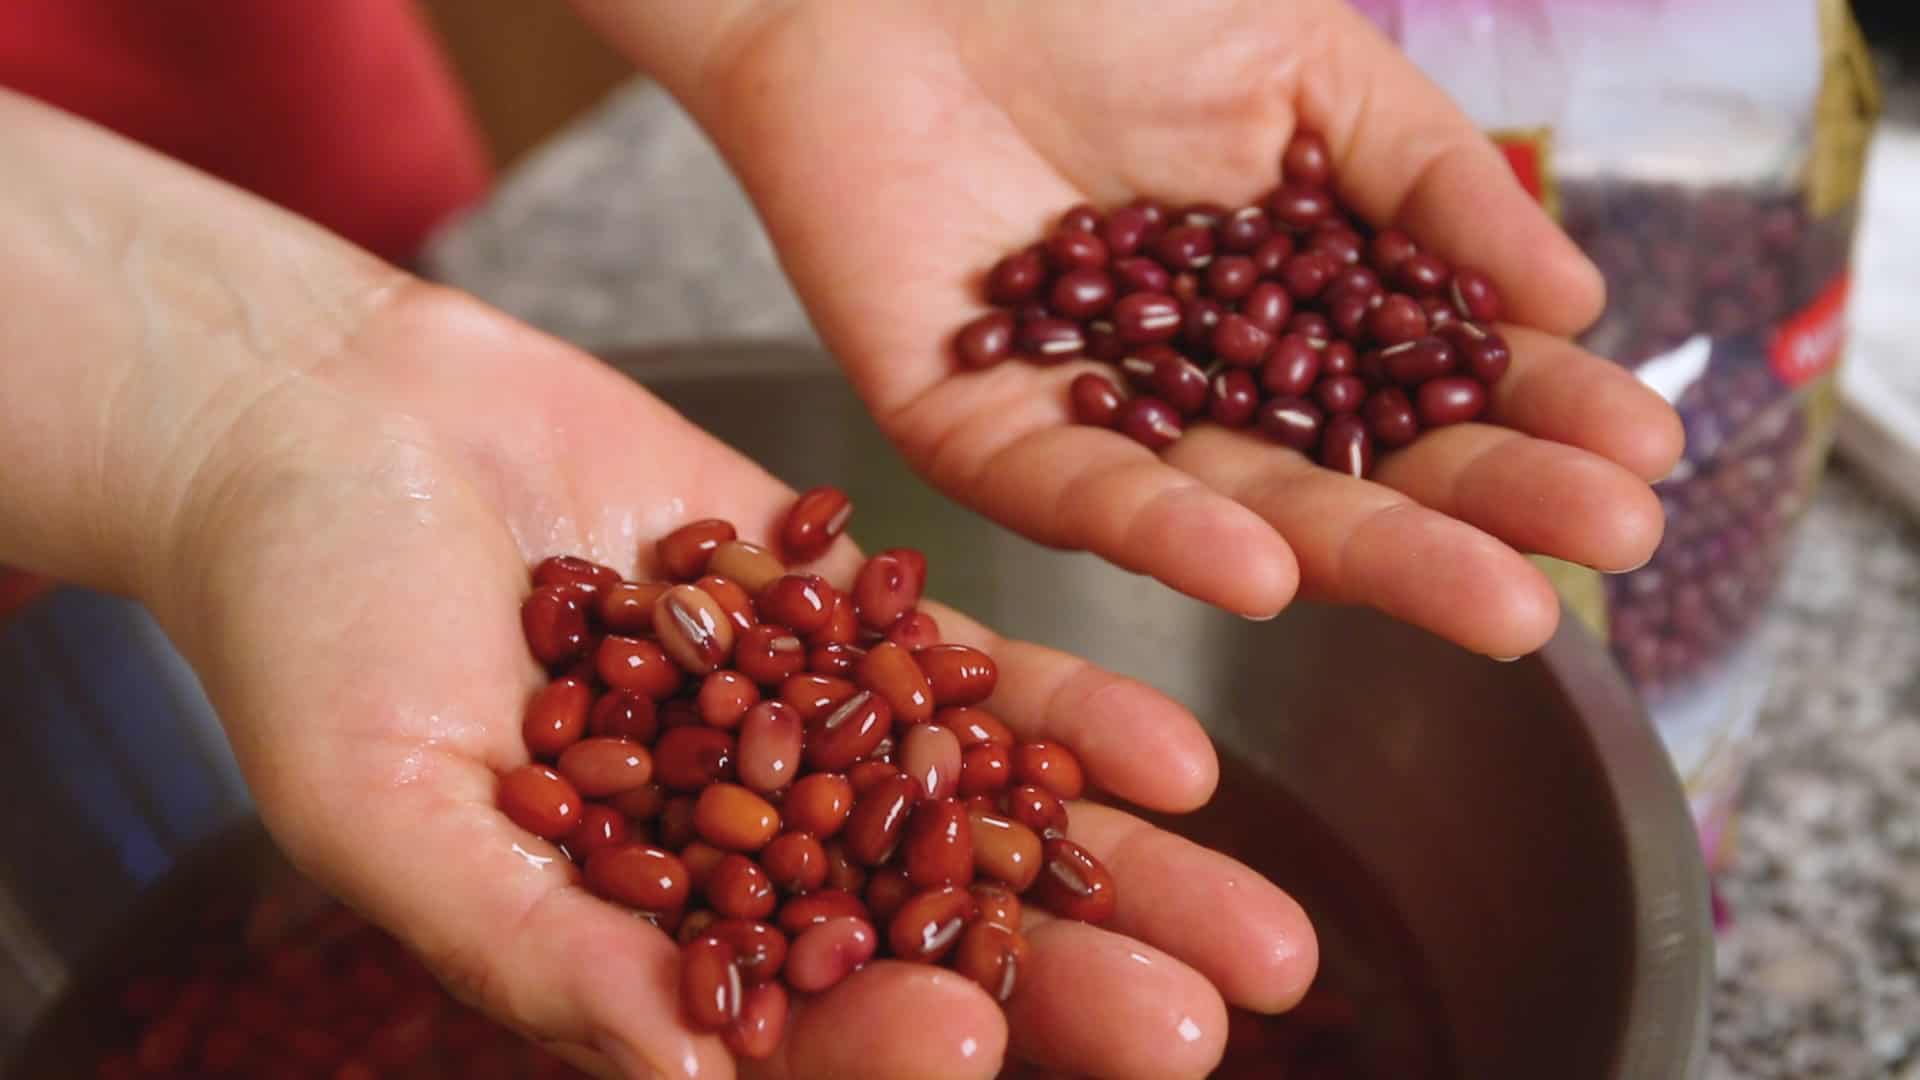
- 1 cup dried red beans (aka azuki beans, or pat in Korean)
- ¼ cup dark brown sugar (or white, brown sugar)
- ¼ cup rice syrup
- ¼ teaspoon kosher salt
- 2 teaspoons vanilla extract
For dough:
- 2 tablespoons butter
- 1½ cup whole milk
- 2 tablespoons white sugar
- 2 teaspoons dry yeast (1 package)
- 1 teaspoon kosher salt
- 3½ cup plus ¼ cup all purpose flour
Directions
Prepare the beans:
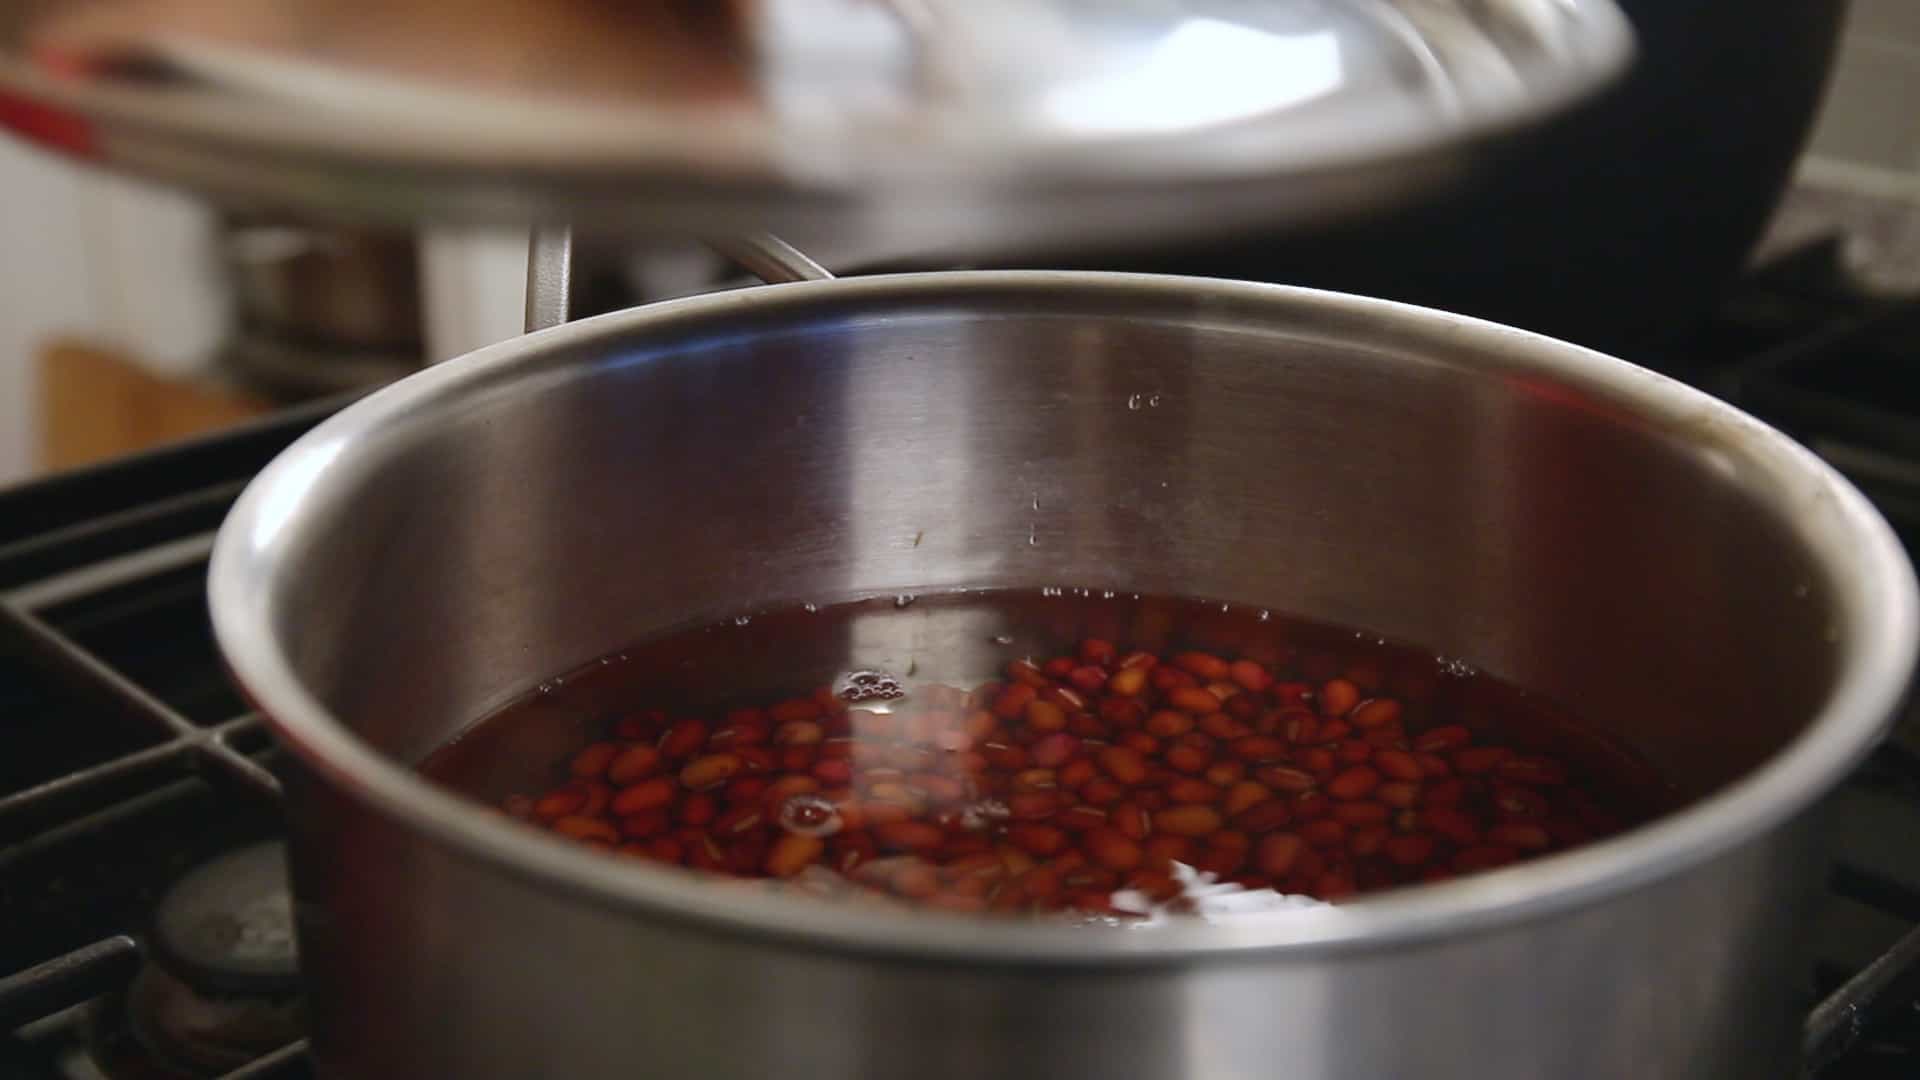
- Wash and soak the red beans overnight, for at least 10 hours. They will expand to about 2½ cups of beans.

- Drain and put the beans into a heavy pot. Add 4 cups of water. Cook for 1 hour over medium heat until the beans are very tender.


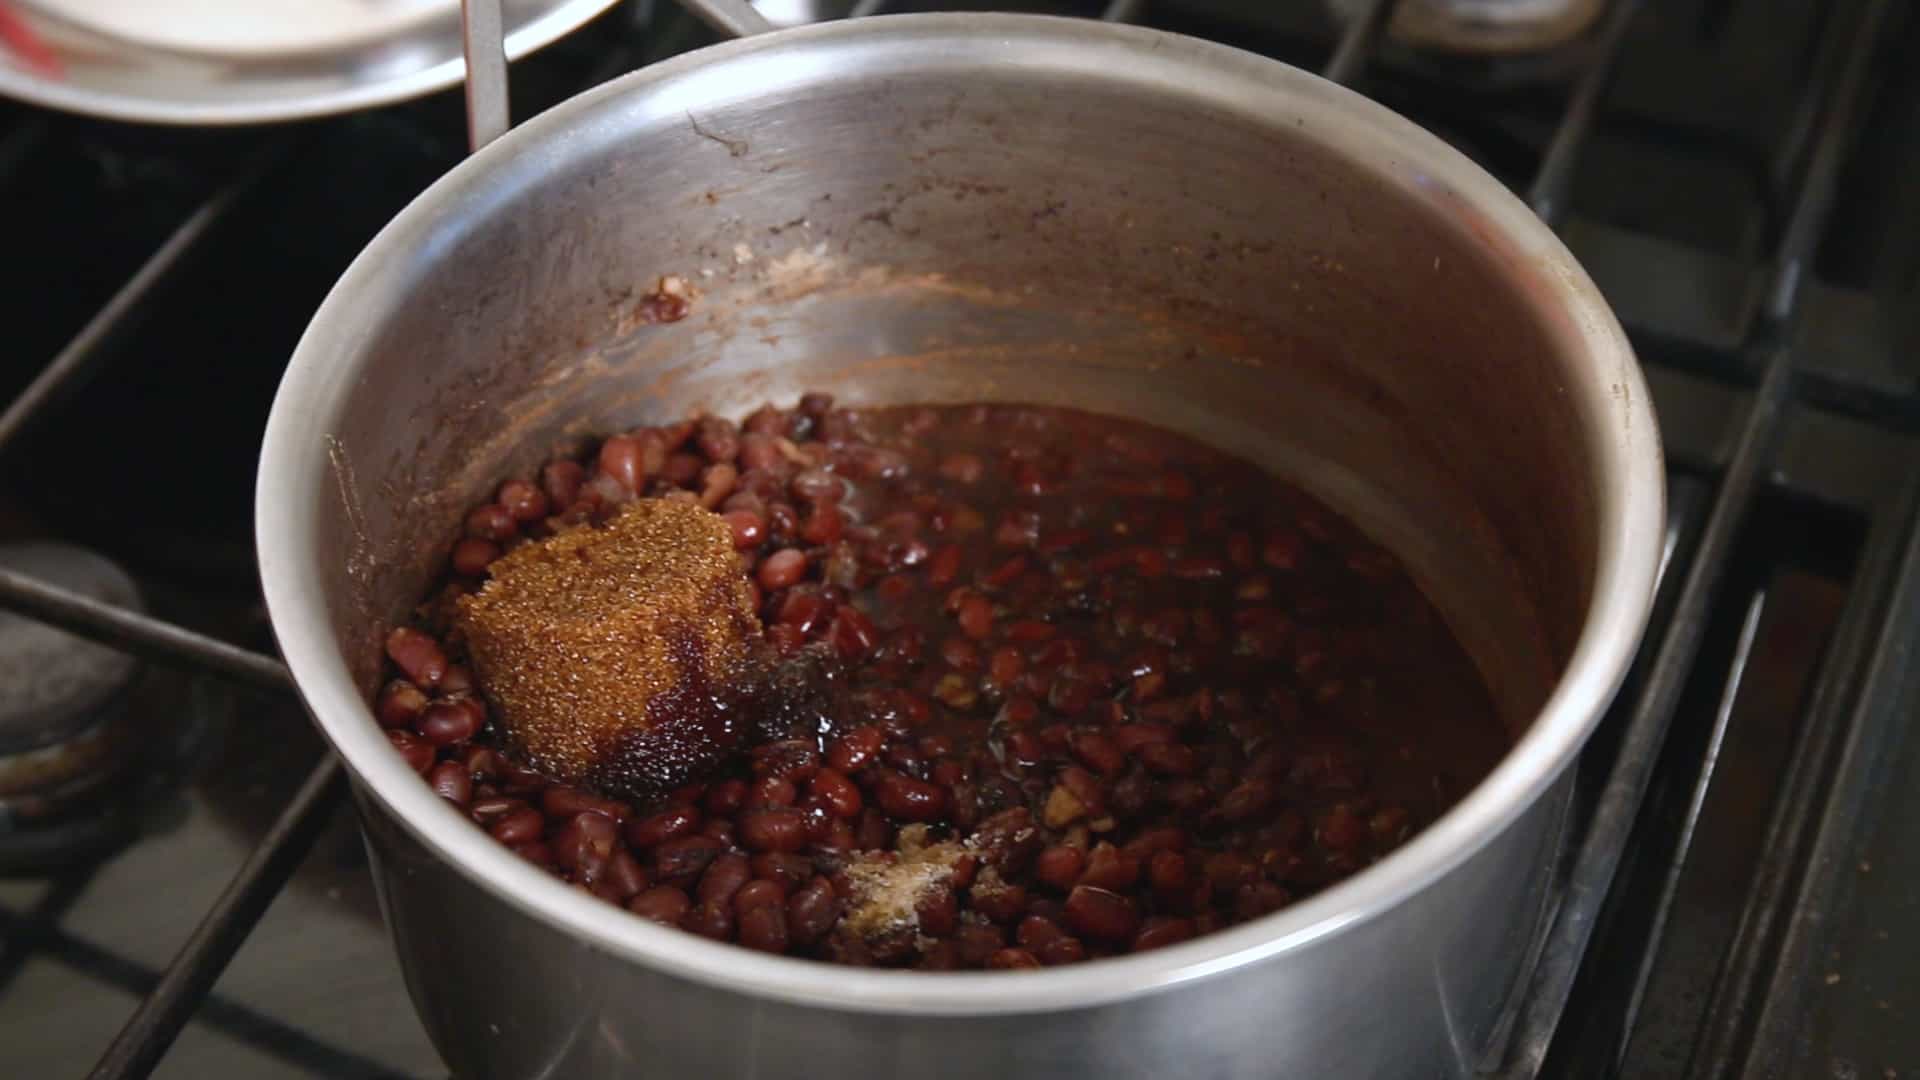
- Add sugar, rice syrup, kosher salt, and vanilla extract. Roughly mash with a potato masher. Turn up the heat to medium high heat and stir a few minutes until the bean mixture turns thick and juicy. Remove from the heat. Cover and set aside.


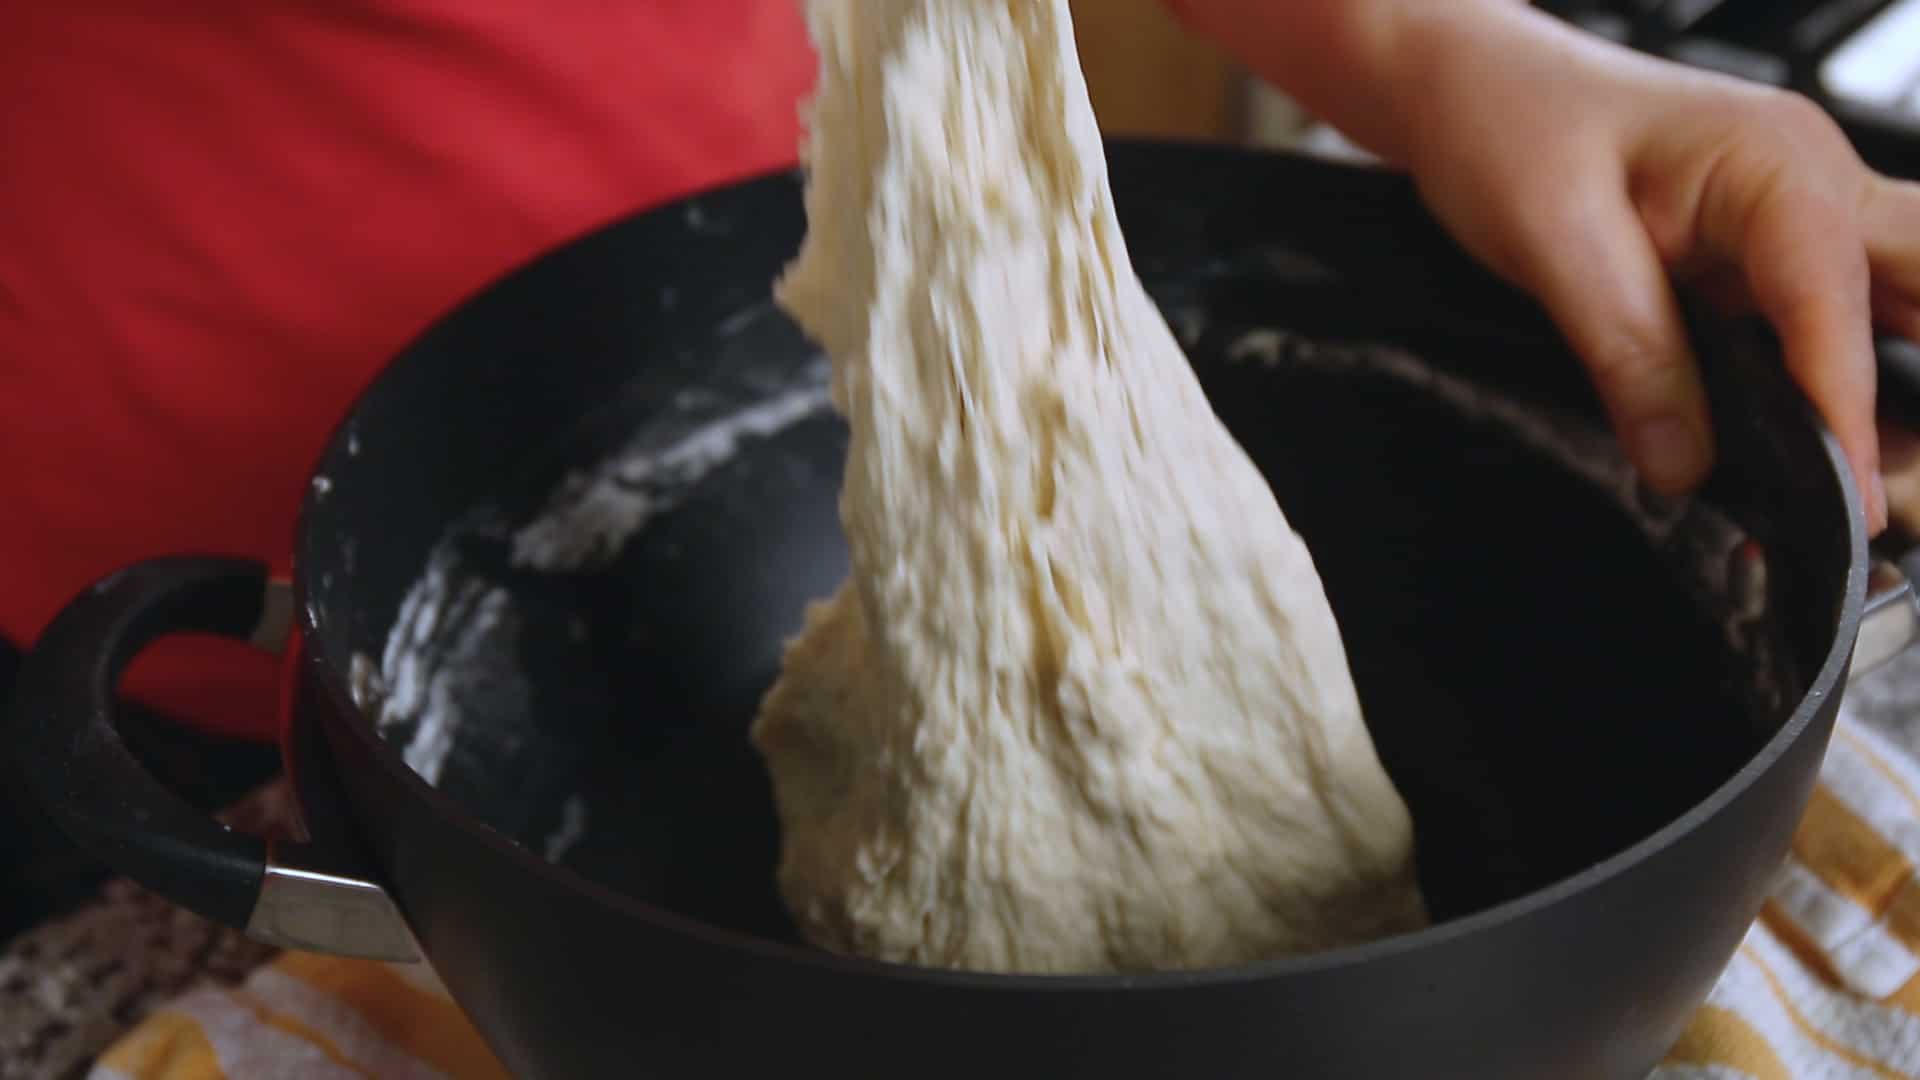
Prepare the dough:
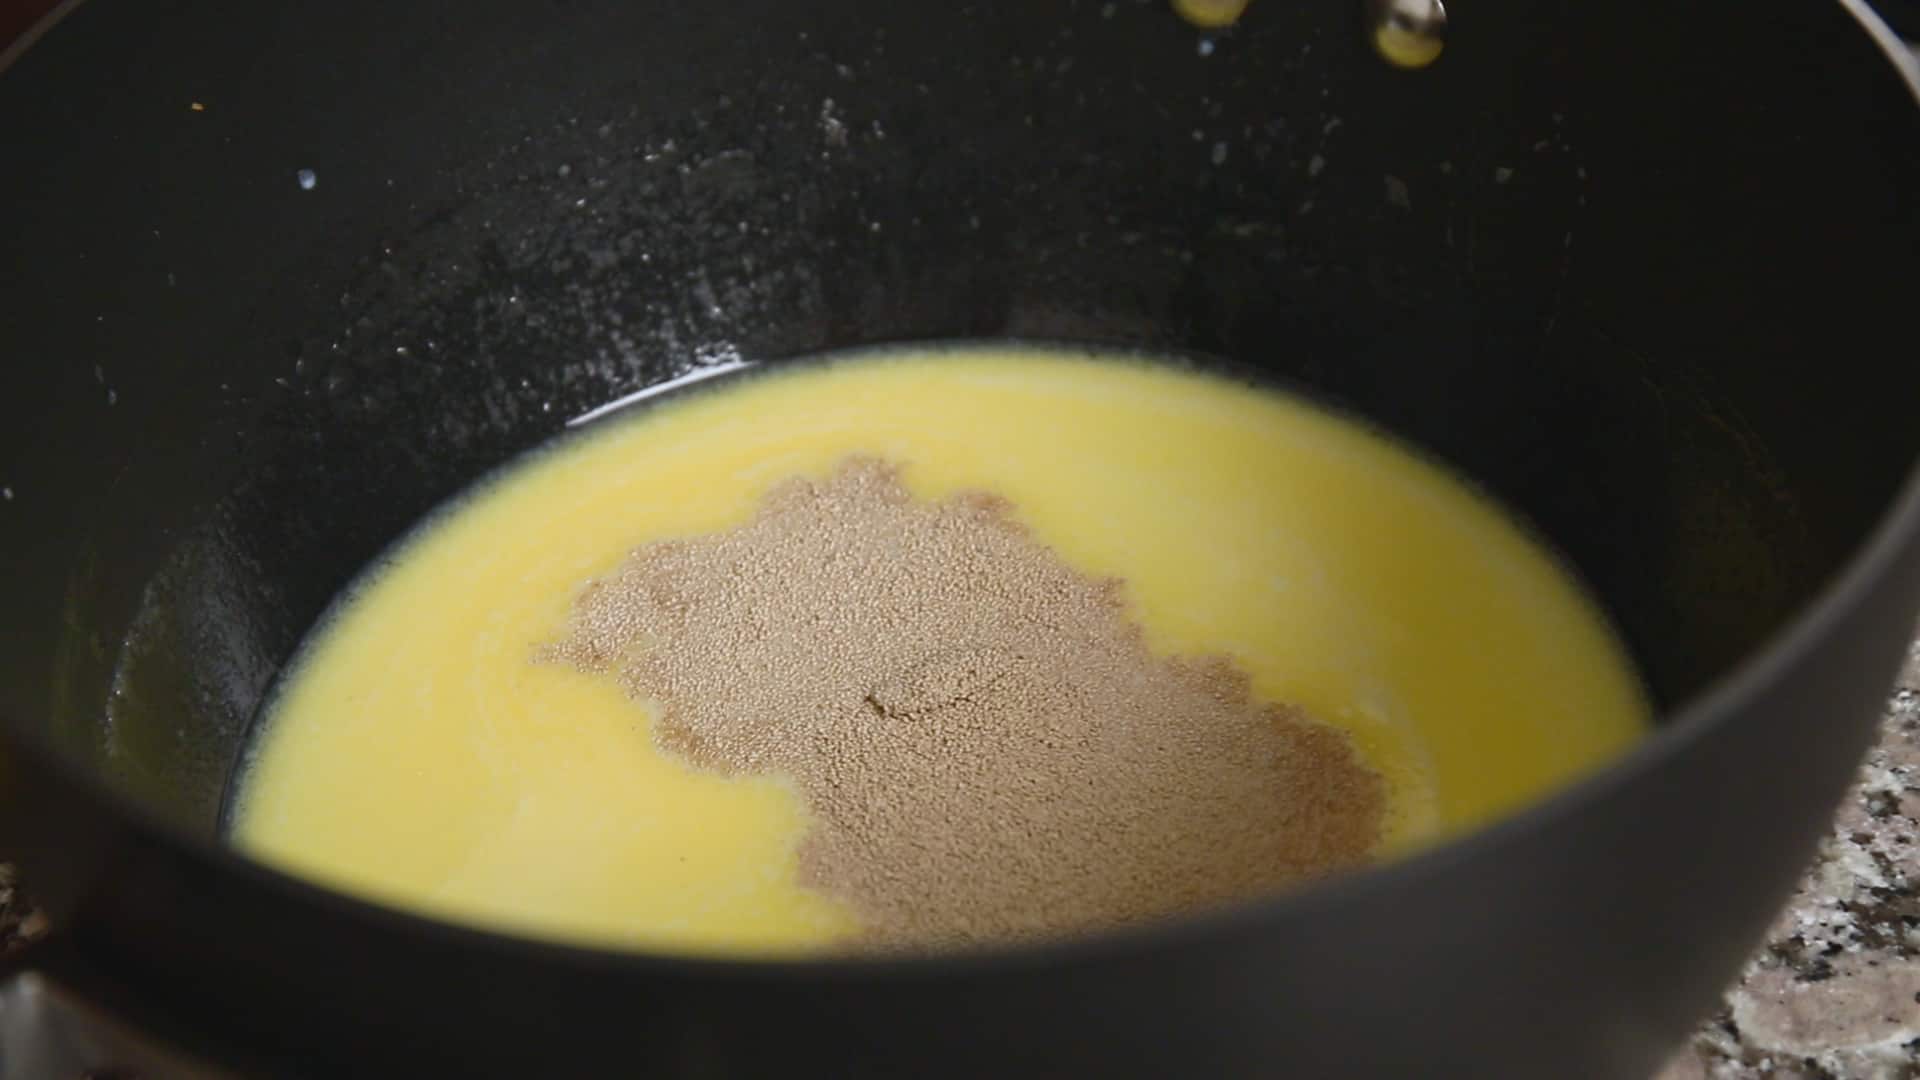
- Heat the butter in a large heavy pot over medium high heat. Stir with a wooden spoon until well melted. Add sugar and stir well. Remove from the heat.
- To cool it down so the yeast can work, add cold milk and mix it well. Then add the yeast and let it sit for 5 to 10 minutes until the yeast gets foamy.

- Add the salt and stir it well with a wooden spoon. Add flour and mix well for about a minute.

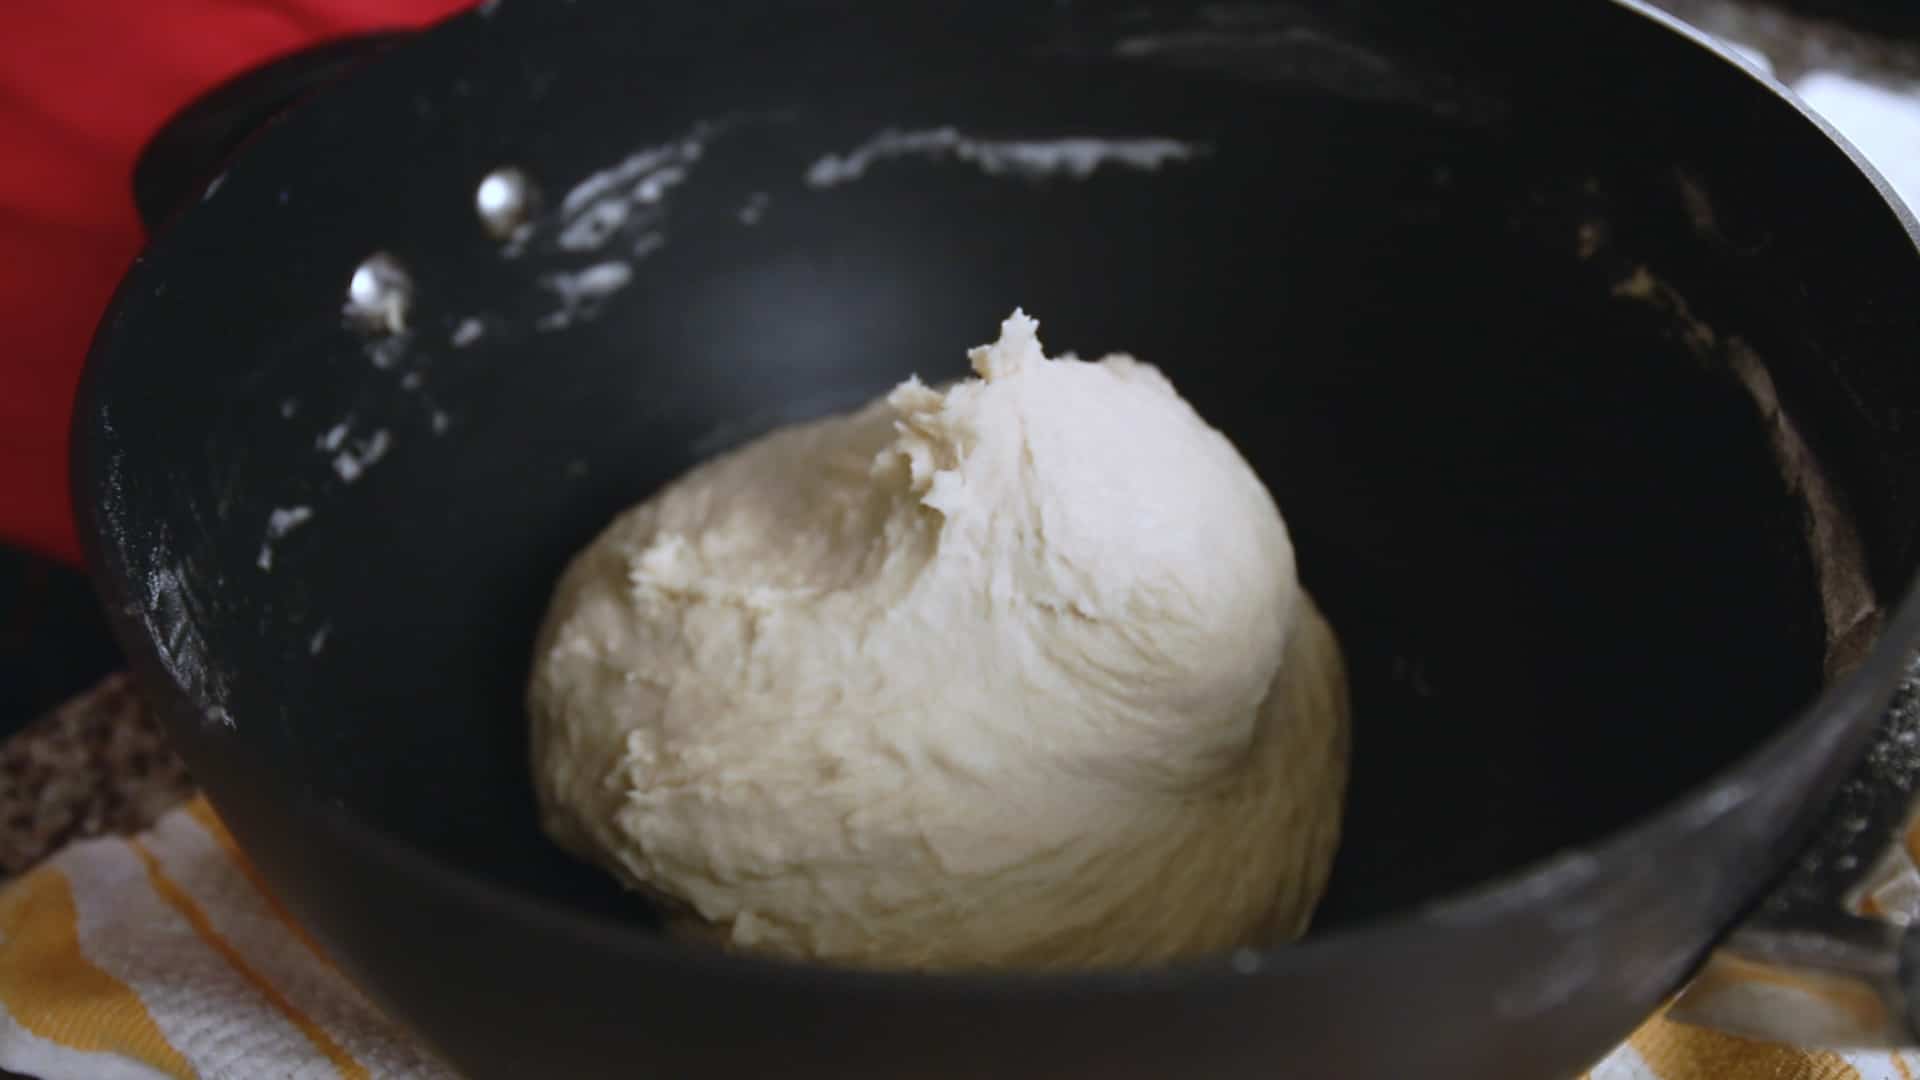
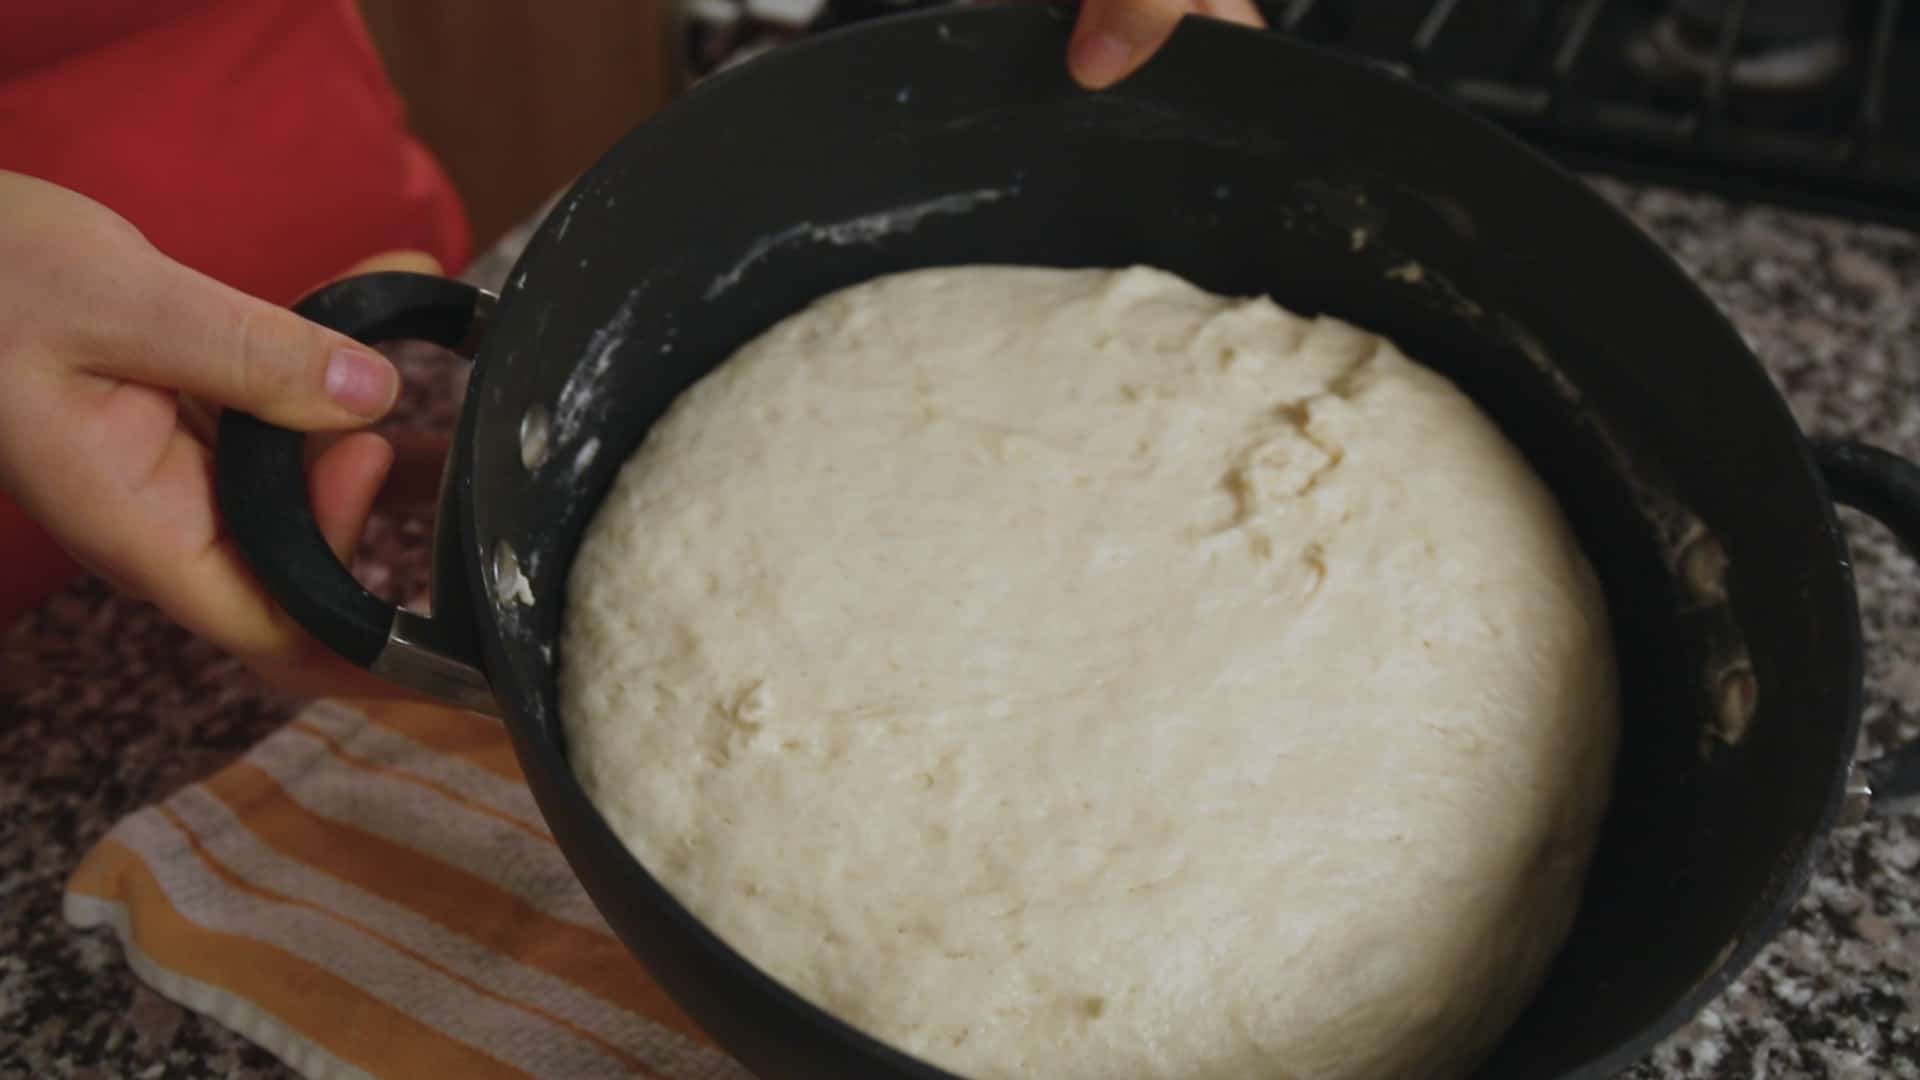
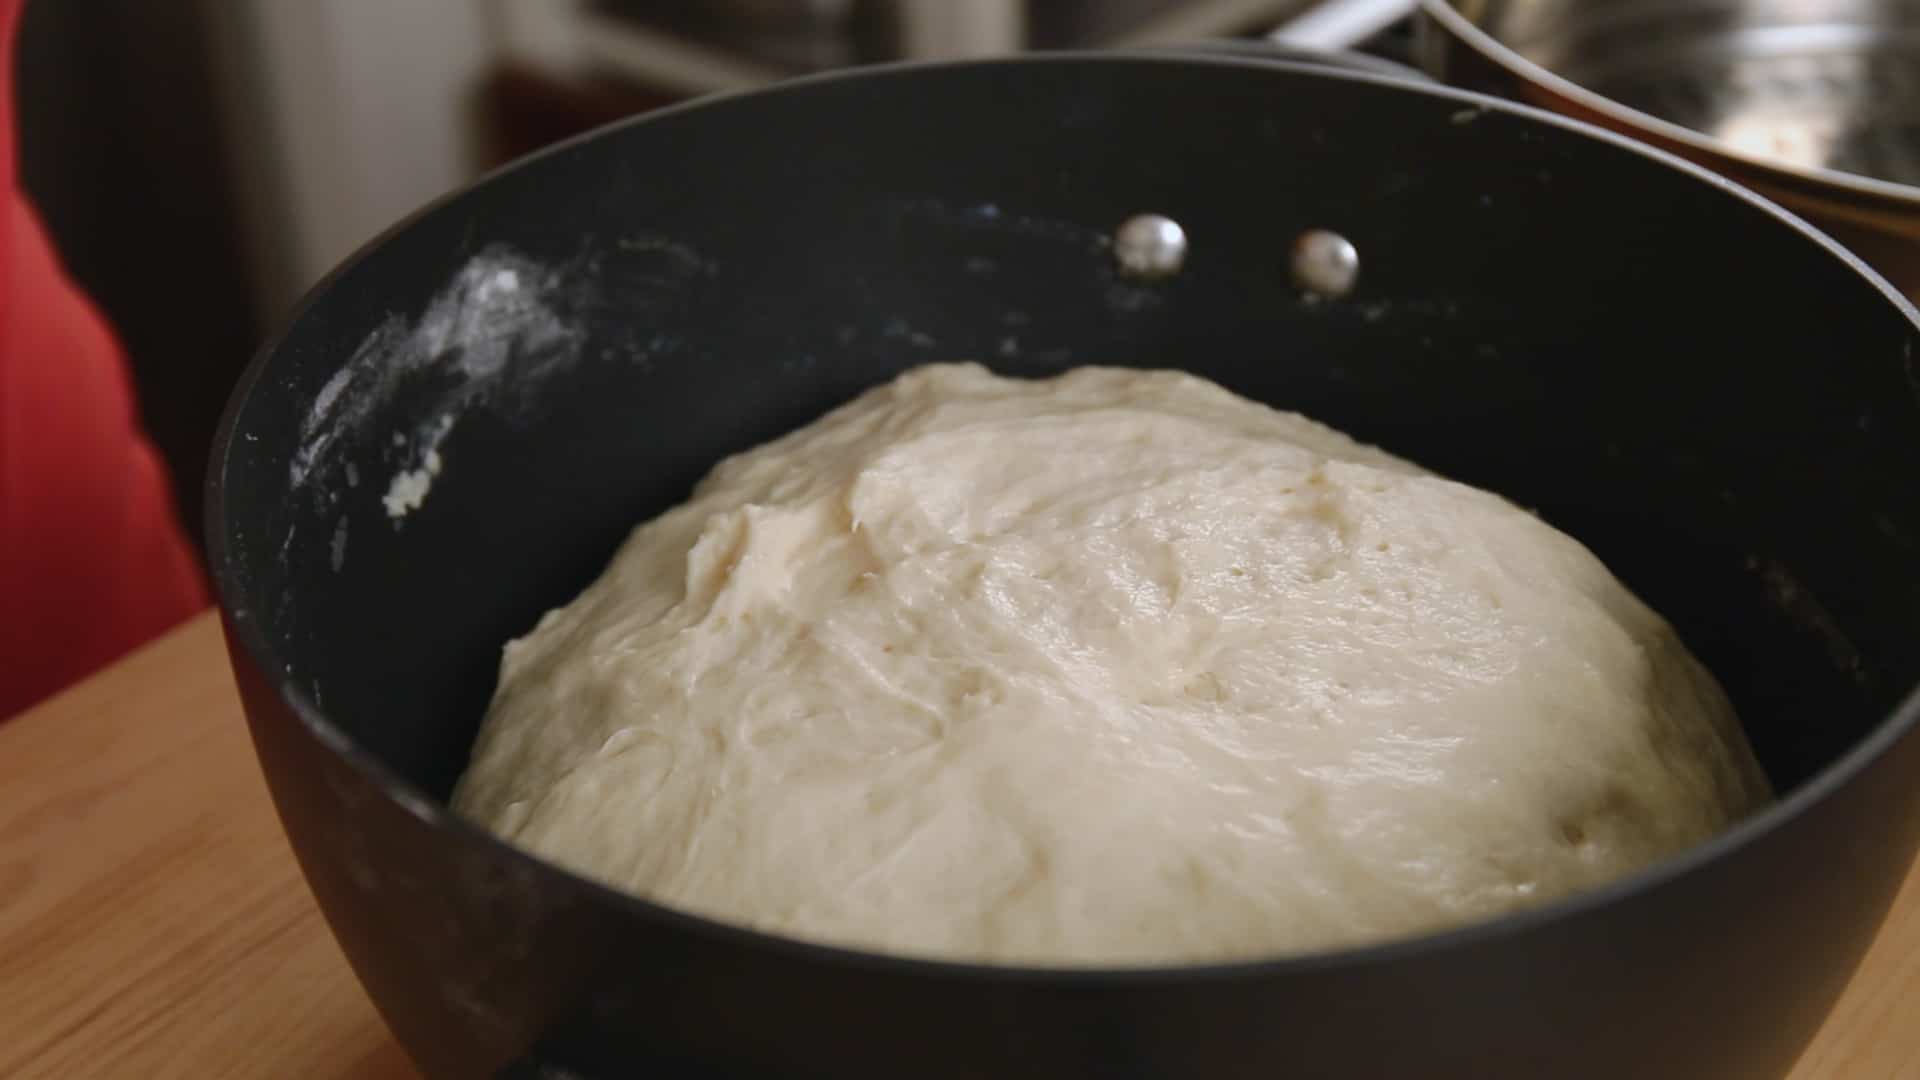
- Knead the dough by hand for a few minutes until smooth. Cover and let it sit on the kitchen counter for 1 hour until the dough doubles in size.


- Deflate the dough and knead it again for a few minutes. Cover and let it sit for 30 minutes.


Make and shape the buns:
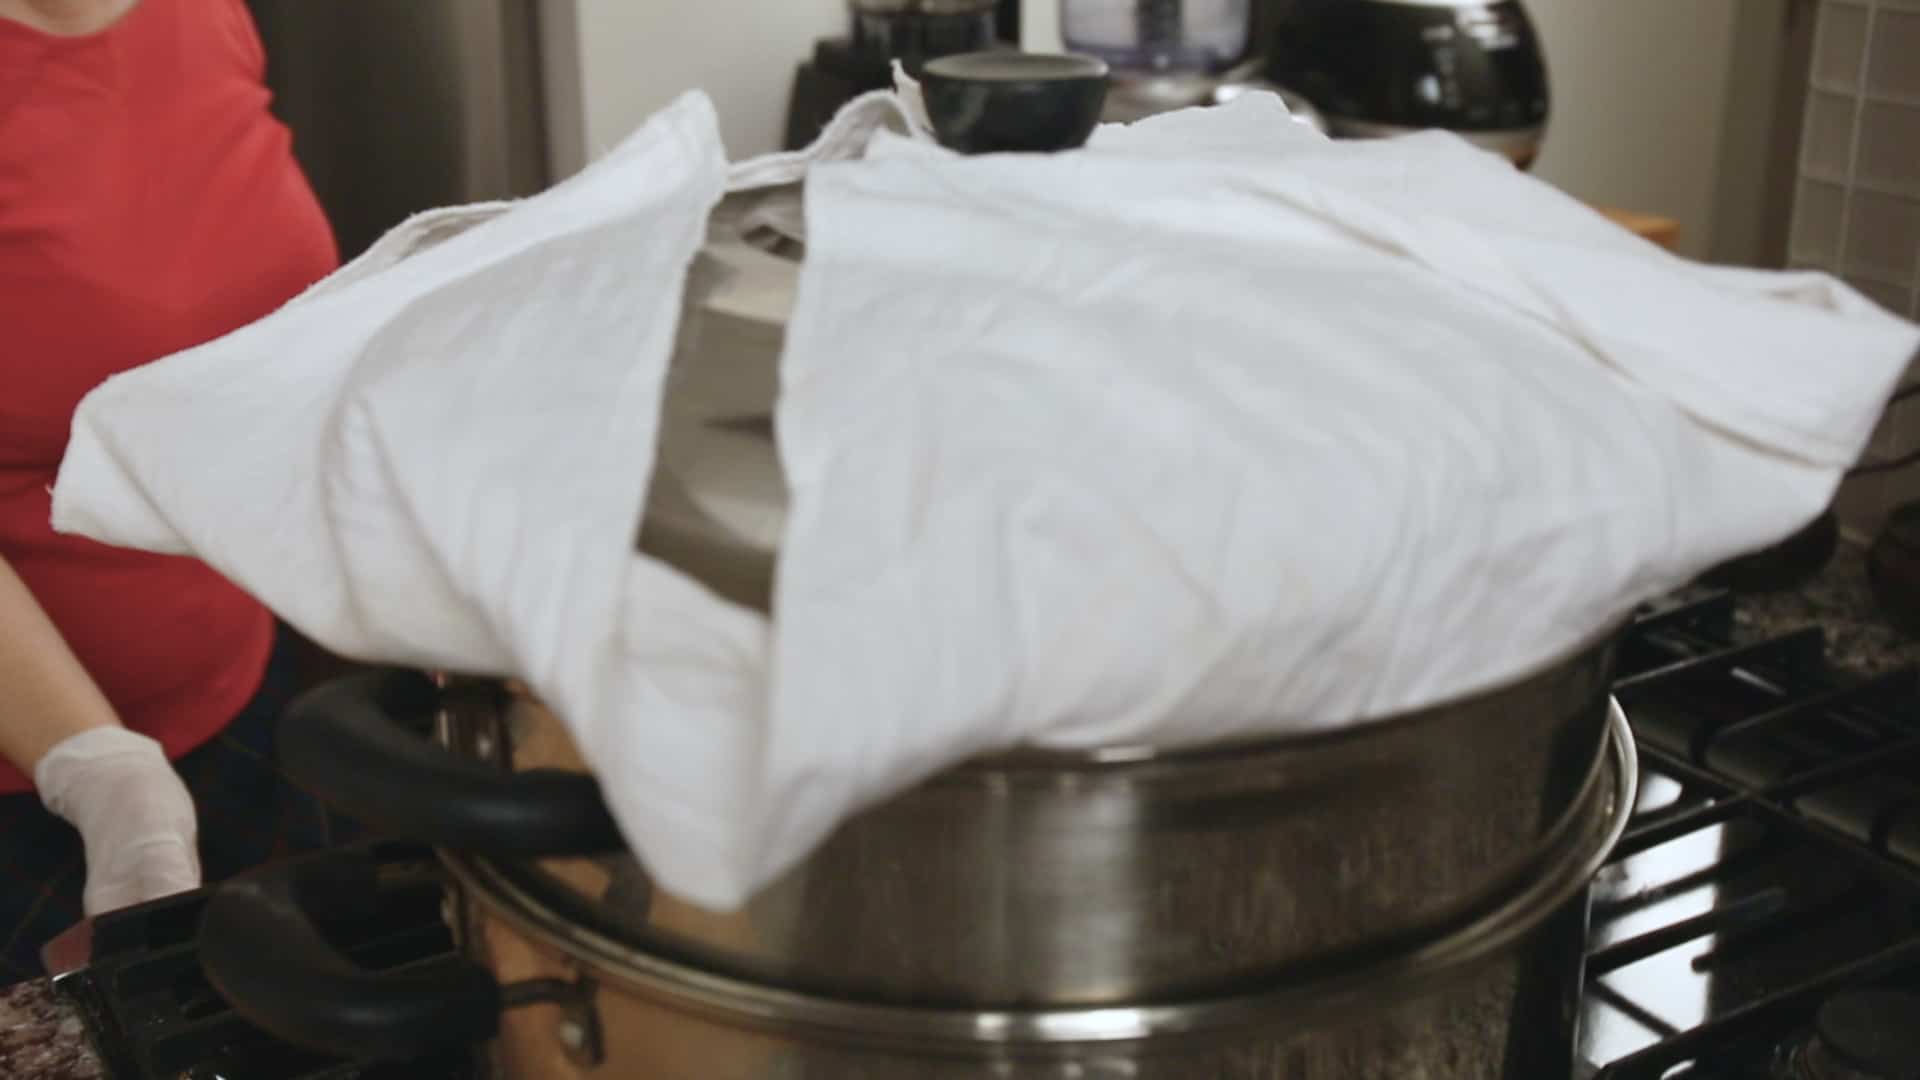
- Before shaping the buns, fill your steamer with about 2½ inches of water and bring to a boil. Remove from the heat. Put the steamer basket next to you, so you can add buns to it as you work. Place a cotton cloth (or “steaming sheet”) in the steamer basket.
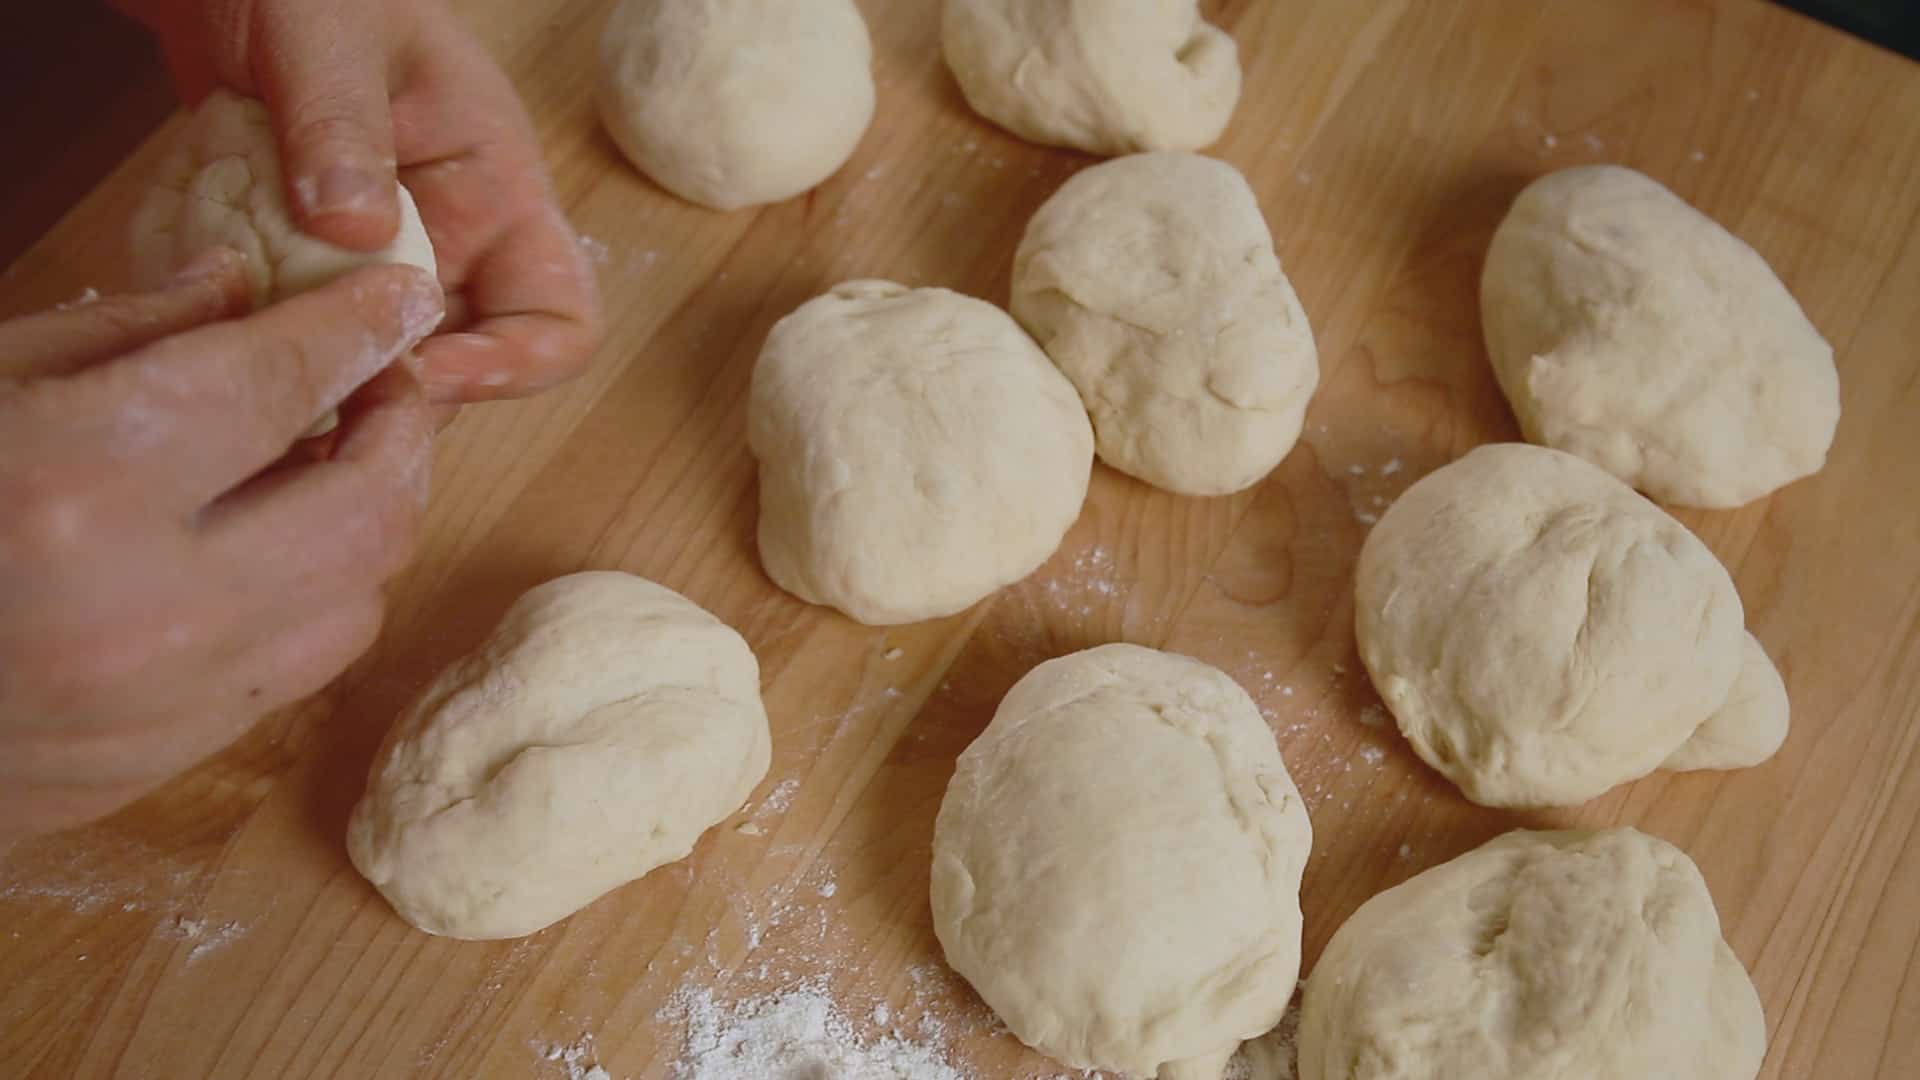
- Deflate and knead the dough until smooth. Use the remaining ¼ cup flour to dust your cutting board.
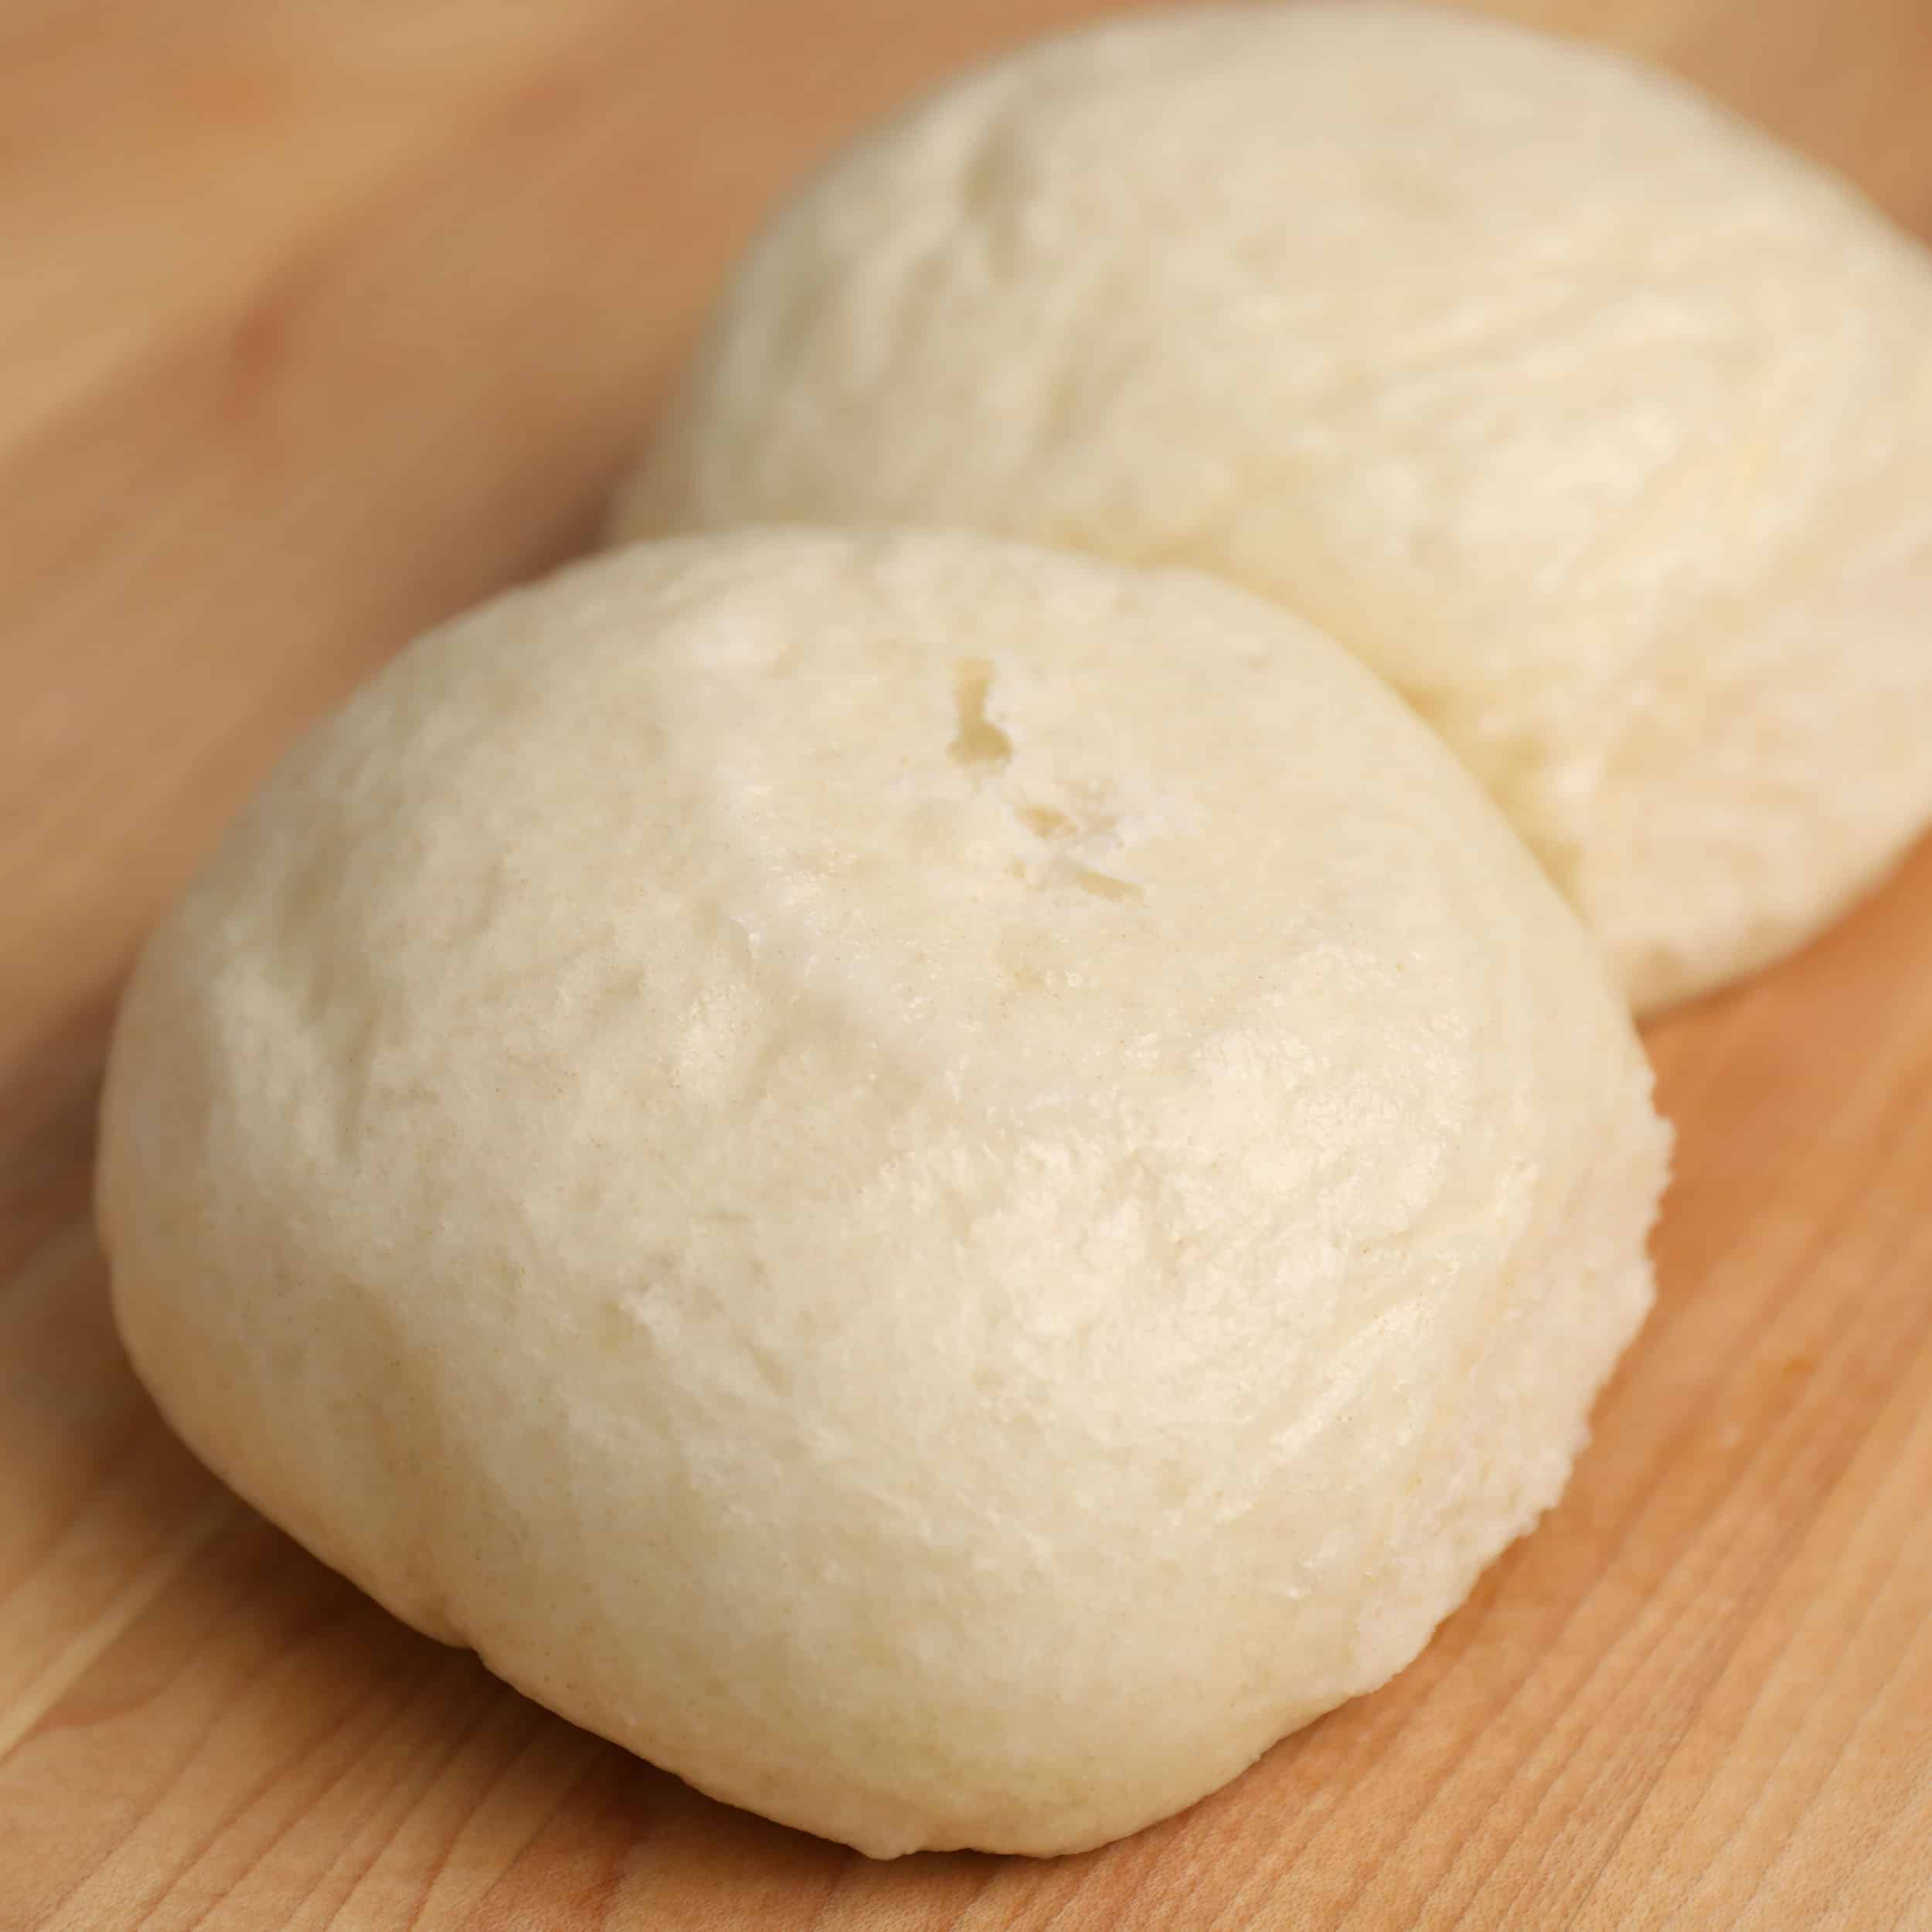
- Divide the dough into about 10 pieces, with each piece being about 3 ounces. Form into smooth balls and put them on the cutting board. Cover the dough balls with plastic wrap to keep them from drying out while you work.

- Flatten each dough ball into a disk about 3½ inches in diameter. The edges should be thinner than the middle because we’re going to gather them together to form a bun and we don’t want that part to be too thick.
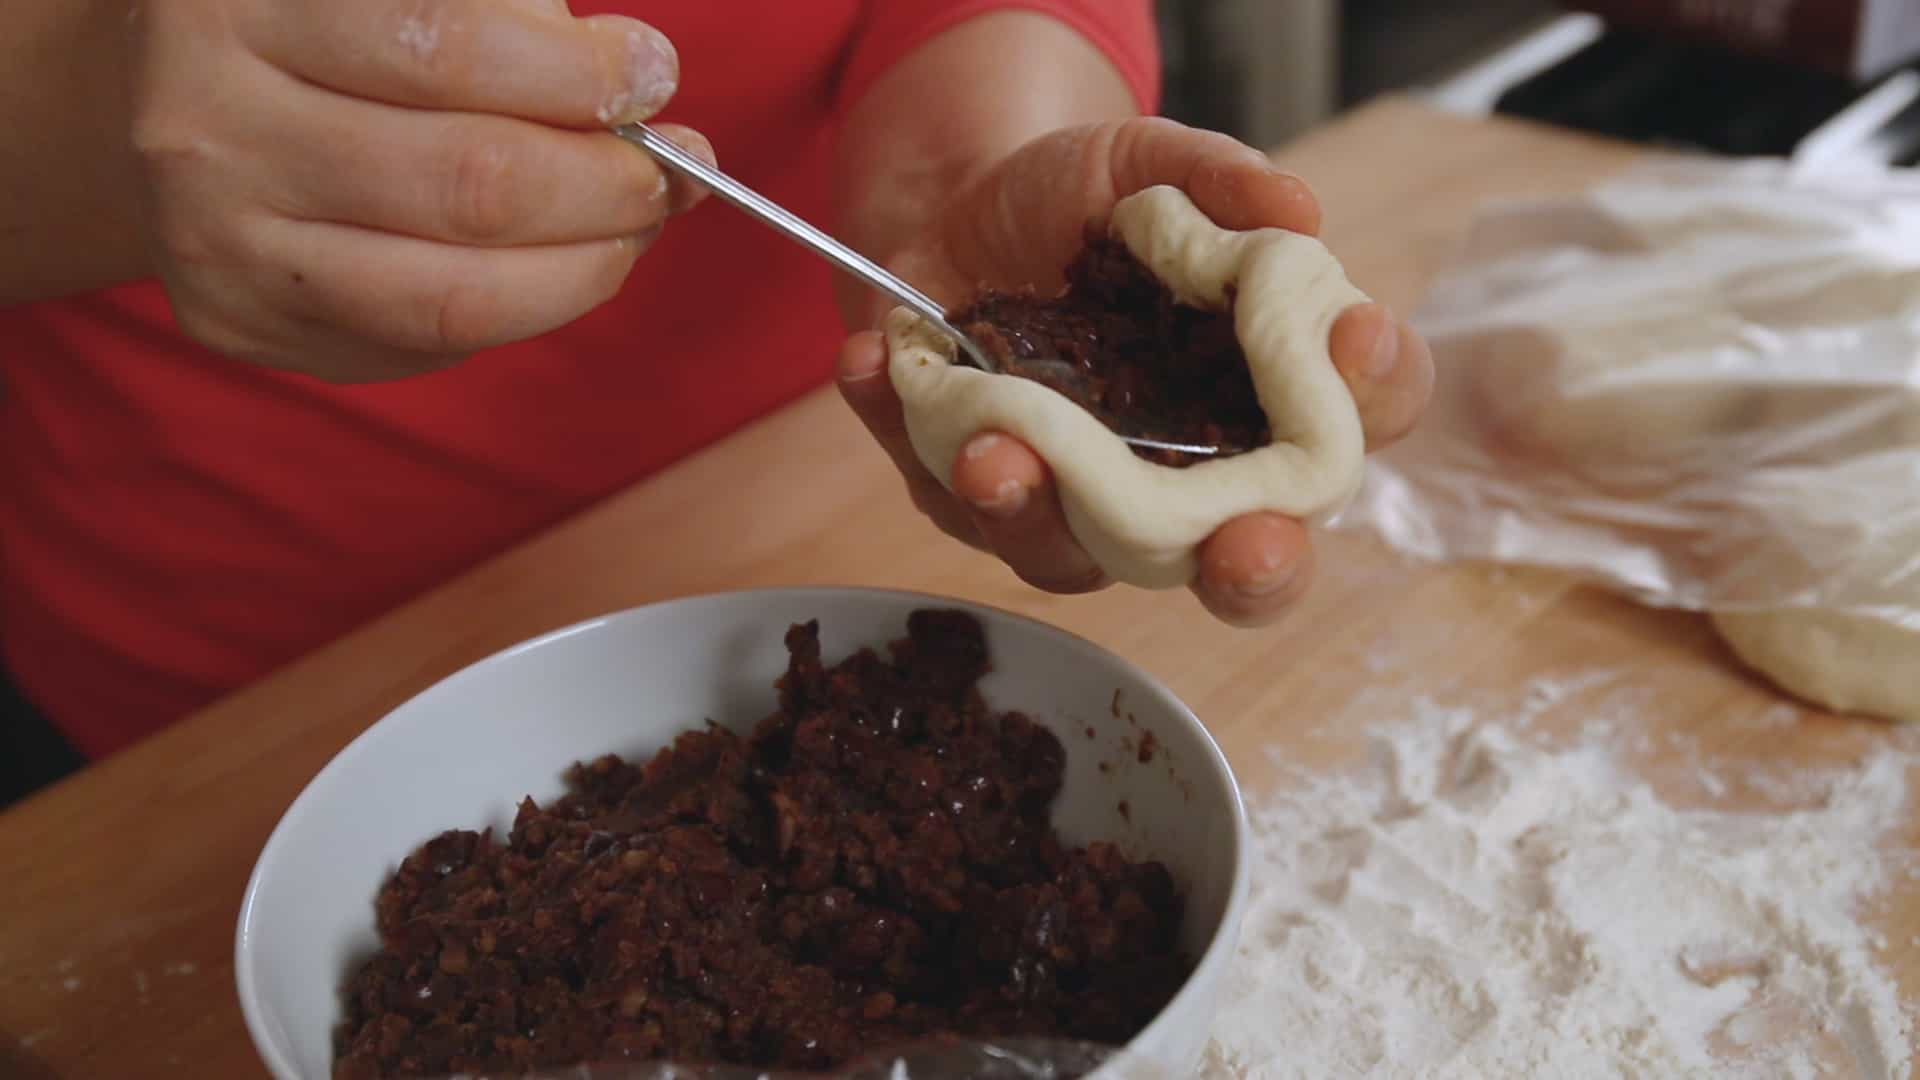
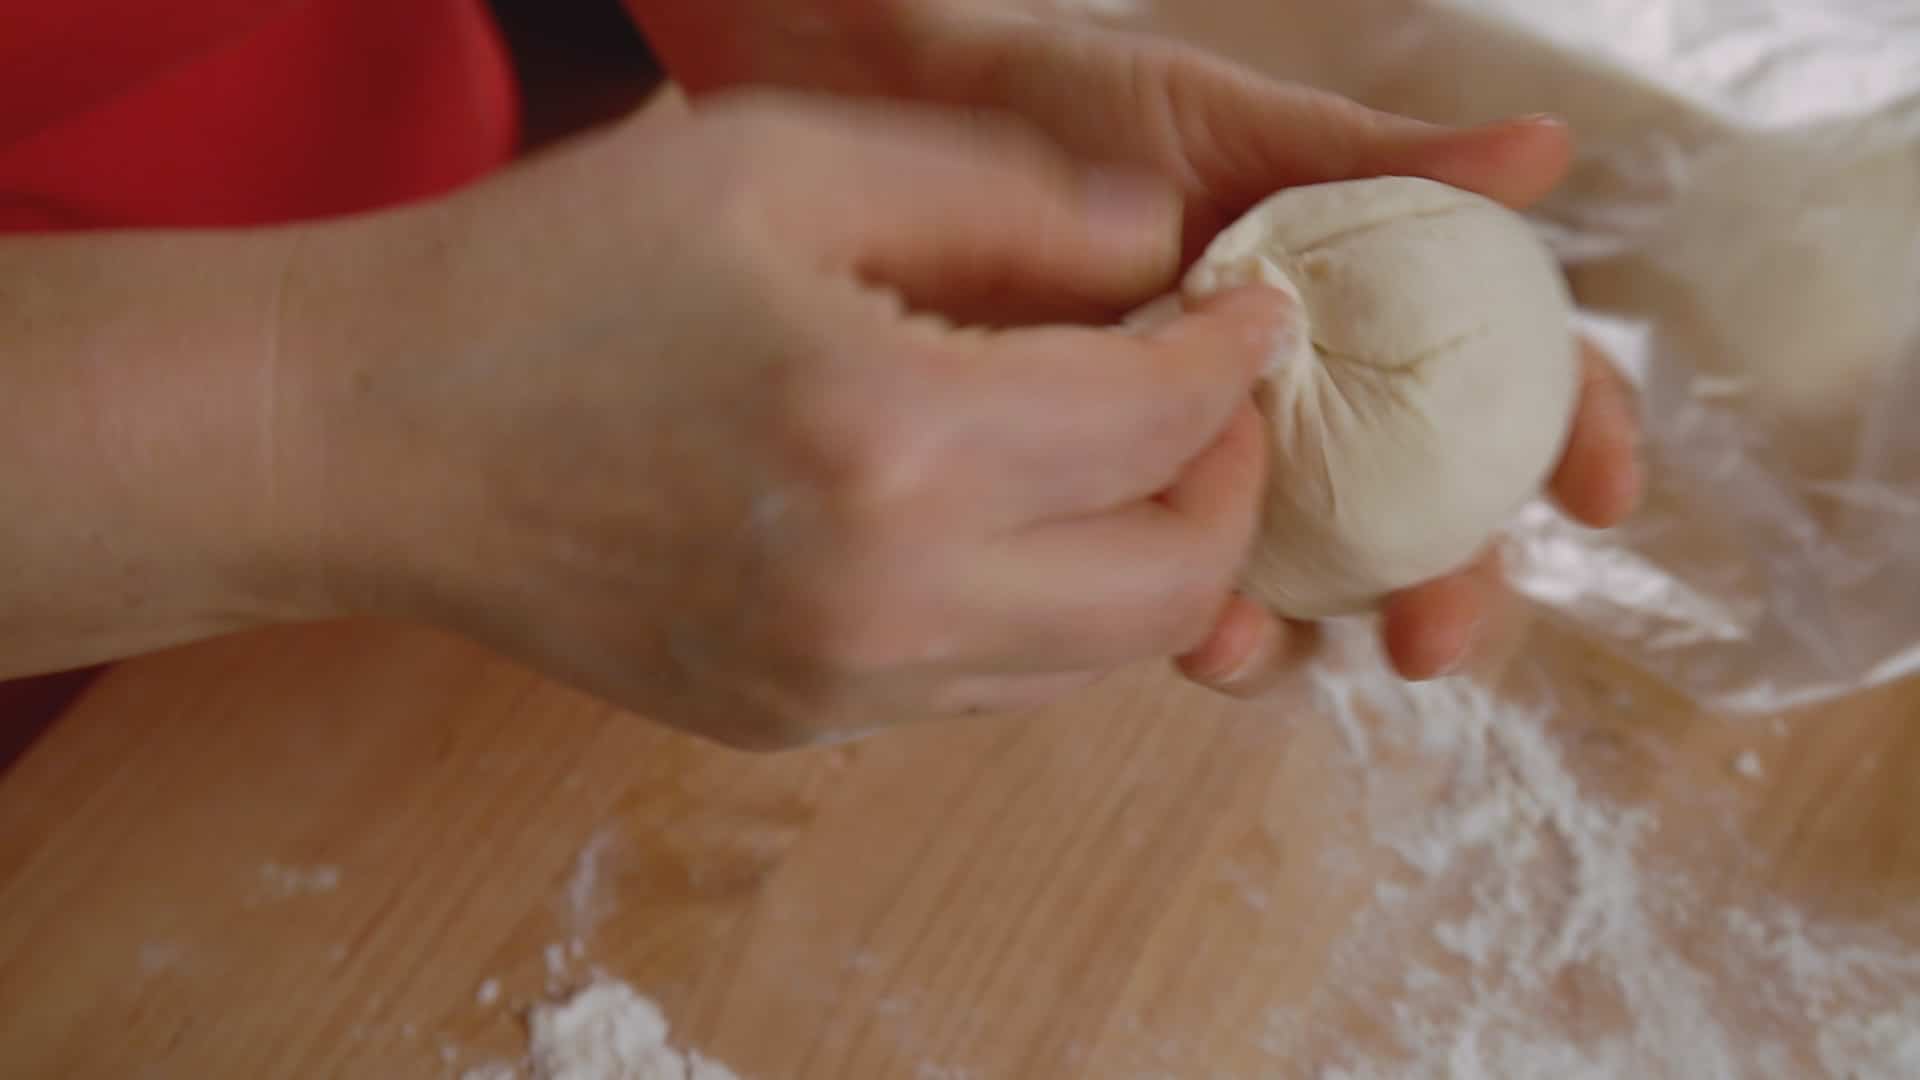
- Put about 2 ounces of sweet red bean filling into the center of the disk. Lift the edges up around the filling and pinch them together to seal tightly and make a bun.
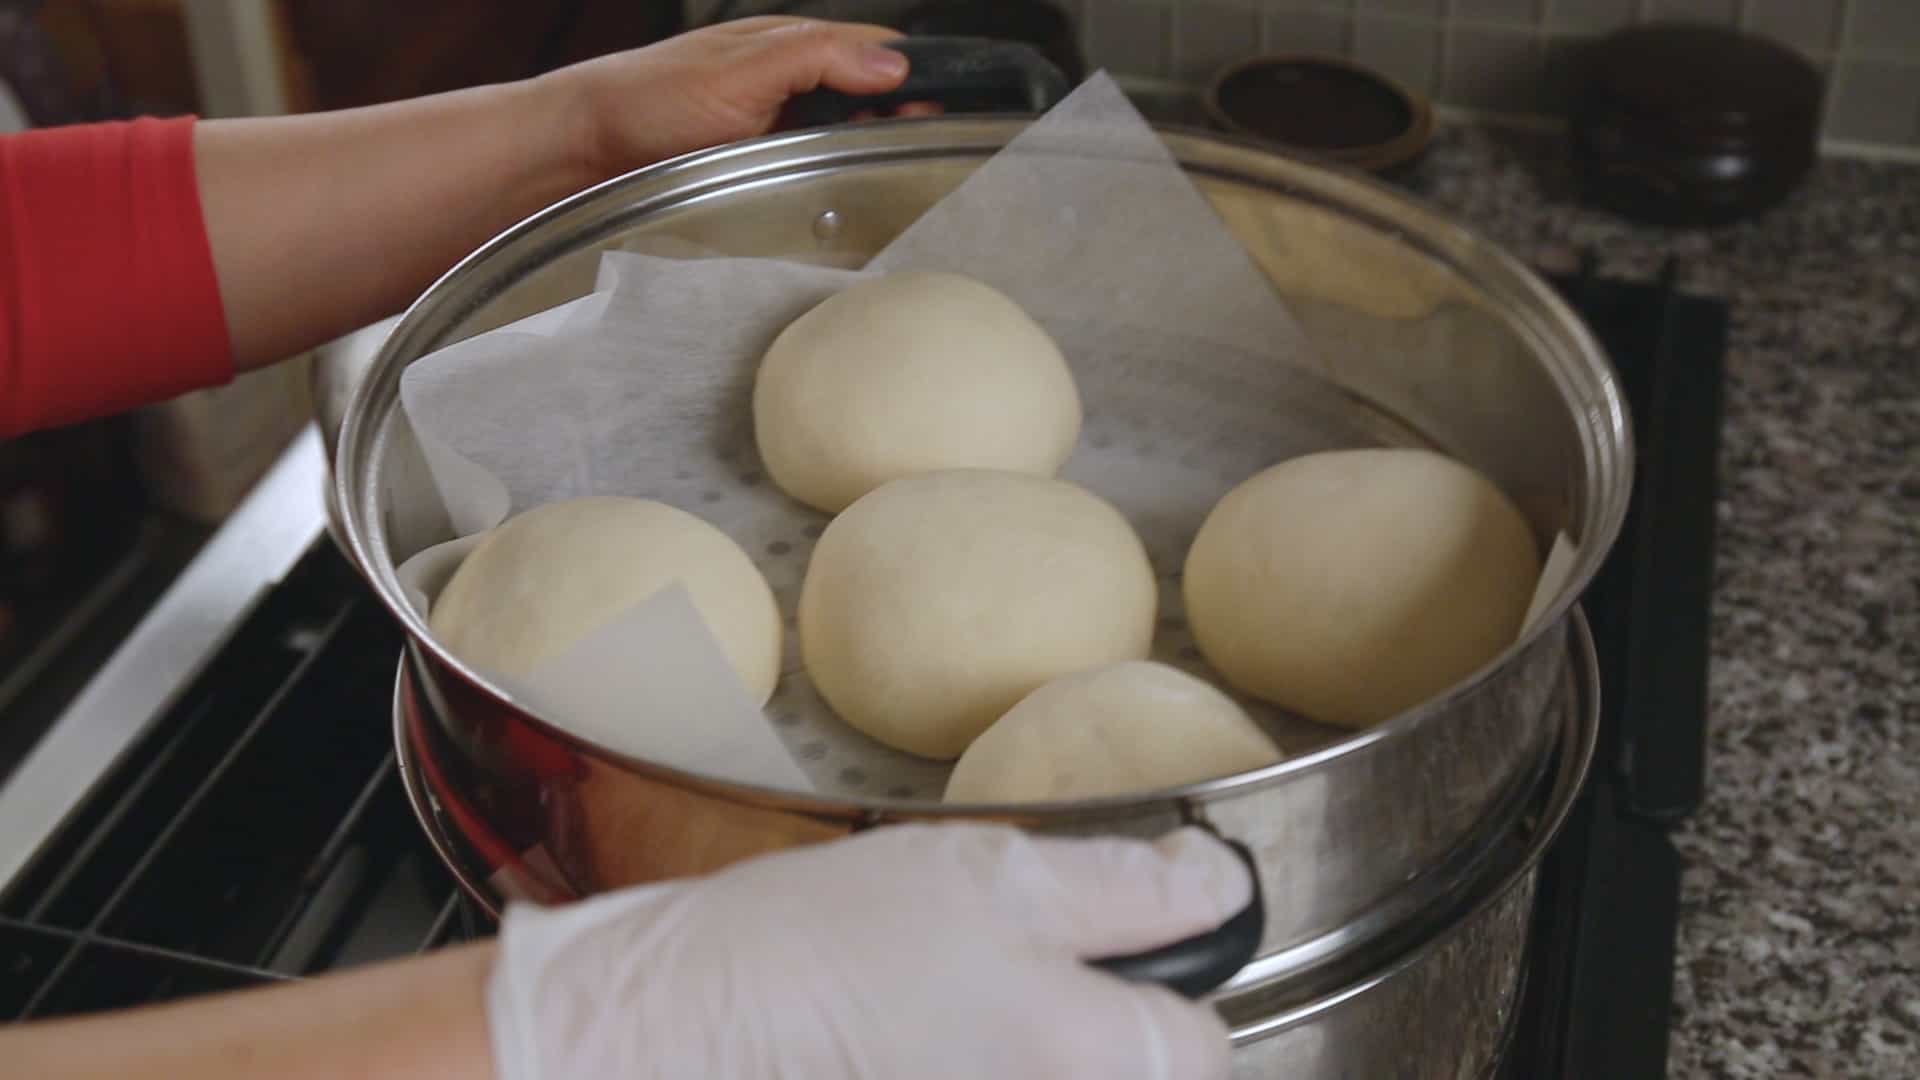
- Put it on the cutting board with the sealed side down. Turn it around and shape it with your hands into a small mountain. Put it on the steamer basket lined with steamer liner or perforated parchment paper.


- Make the rest of the buns, spacing them 1 inch apart on the steamer basket so they have room to expand. Let them rise for 30 minutes.


Steam and serve:
- Reheat the water in the steamer and put the steamer baskets with the buns inside. Put a large cotton cloth under the lid so that the water doesn’t drip back down onto the buns. Cover and steam over medium hight heat for 12 minutes.


- Turn the heat down to low and cook an additional 3 minutes.
- Remove from the heat and serve right away.


- Freeze (up to one month) or refrigerate (up to one week) any leftovers. When you want one, steam or reheat it in a microwave.

Maangchi's Amazon picks for this recipe
It's always best to buy Korean items at your local Korean grocery store, but I know that's not always possible so I chose these products on Amazon that are good quality. See more about how these items were chosen.


Hi Maangchi,
I would like to make this delicious buns but I have a question before making the buns.
What is this rice syrup from that has to be added to the red beans?
Thank you and hope to hear from you soon!
You can add rice syrup, corn syrup or sugar. Rice syrup: https://www.maangchi.com/ingredient/rice-syrup
The recipe for rice syrup is here. https://www.maangchi.com/recipe/ssal-jocheong
I finally made them!
My first bun didn’t make it the filling popped out the back of the bun. Total fail. The other nine were good though.
My dough was so very sticky, was it suppose to be so sticky?
See full size image
It looks so fluffy!
Hey maangchi,
I made it today ..it’s so yummy
So, thank you very much for the recipe
great!
Hey Maangchi! I was wondering if I could use this dough for the japchae and pork while also making it rounds and not folded!
I do not usually leave comments, or join websites. But this recipe and others have been so helpful to our mental health over these past few COVID shelter in place months. I had no idea how to make so many of my families favorite Asian foods. And your recipes are so easy to understand and presented so well! So when I made these, I ran out of the bean inside so I stuffed a couple with BBQ pork OMG so good. So then the next time I made this recipe I double it, and actually only made the dough. I went crazy with the dough stuffing it with so many different things from egg, ham and cheese, to ginger beef etc. Then I decided to bake some instead of steaming them, because I did not have enough room to steam them all. And each and every one – baked or steamed was excellent. We will go to Philadelphia Chinatown when it is open again, but for now, I can keep the family very well fed with their favorites. Thank you :)
hi, maangchi
my dough isn’t as sticky as yours. what did I do wrong?
mine is kind of hard ball.
Made this today … thank you ….
See full size image
Congratulations! They look so fluffy and delicious!
Hello
I’m from Brazil, i love your site and your recipes.
My jjinppang is very delicious and soft.
my pan is small because it stuck together.
See full size image
Thank you so much for your recipes, Maangchi!! I’m getting better at cooking because of your videos and recipes :)
I made your steamed red bean buns and added matcha powder into the dough. Everyone in my family loves it so much, thank you!
See full size image
I tried making these and the beans after cooking were watery. Not thick like yours. I used 4 cups of water like recommended. They were really mushy and soft/cooked before all the water evaporated off?
Keep stirring with a wooden spoon to thicken it and use.
Hi Maangchi! Thank you so much for this recipe :) How long should we microwave or steam the buns after we have frozen them?
Hello, Maangchi! =)
I have a question that I’ve been wanting to ask you for a long time, but was afraid to ask. If I were to use a cotton cloth for steaming the buns, would I wet the cloth or leave it dry? What do you do when you don’t use the steaming sheet? Because I used a dry cotton cloth before and I waited for the buns to cook for 15 minutes, and I opened the lid and the buns were still completely dry. I really felt discouraged because I would love to make this bread, especially for my family as we adore the Korean culture. We always have, lol. I’ve seen in your 꽃빵 video that you wet your cotton cloth for steaming the bread. Should I do this for the 찐빵, or just go ahead and use the steaming sheet? Thank you so much in advance.
~Cece
I made these buns today and they turned out perfect, exactly like the recipe and video. Thank you for such clear instructions and a great recipe – I have a feeling this will be requested a lot in my house going forward.
I may try adding some cinnamon to the beans at the time that the sugar is added – I think that would be a nice way to spice it up. Mace might be a good spice to try, too.
Oh, also, I don’t have the type of potato masher that works on small things like beans (mine is metal and the bars are spaced too far apart), so I used my Pull and Chop – it’s a small, manual food processor where you pull a string to make the blades turn – it made the beans come out exactly as described – some of them whole, and with the skins included.
Thank you Maangchi!
-Jes-
Hi Maangchi, I tried making this and I cut the recipe in half.
For some reason, the yeast wasn’t very foamy and I don’t know why. I made pizza dough in the past so I know how yeast foams up… I make sure the temperature is right (around 110 F).
The final product was delicious but the texture of the bun was not too great. The dough didn’t puff up beautifully like yours!
“the yeast wasn’t very foamy and I don’t know why”
Maybe your yeast was too old? or try lowering the temperature?
Hello Maangchi:
Just made the buns and they turned out to be exactly like the one you showed us above.
Excellent, thanks so very much for this healthy dish. I however made it with gluten free flour and increased the quantity of yeast and still they were just as good and delicious.
THANK-U!!!
i made these and they turned out great!! they’re so soft and fluffy. my sister and i both loved them! c:
I’m so happy to hear that! : )
Hi Maangchi,
Thanks for the steamed bun recipe. I am definitely gonna make it. Would you also put the recipe for veggie steamed buns? I grew up eating them and would love to share them with my husband who is not as familiar with korean food. Thanks so much!
Jaekyoung
I succeeded at making the bun part so I want to move onto the filling now! :D
I soaked my azuki beans in cold water for over 10 hours in the fridge but they still look the same. They’re still rock hard and the same size as before. Can I still start cooking them or should I soak for however long until they become plump like Maangchi’s?
Hard to tell.
Taste the water: If it tastes sour – no chance.
Old beans take longer.
Anyways: Soak them in a cool place, but not the refrigerator – that’s too cold.
If it still takes more than a few hours: change the water to prevent it to get sour.
Adding a pinch of baking soda helps, but may taste funny.
Or (last resort ;-)) you put them in a pot with water, bring to a boil, turn off the heat, let them stand for ten minutes, boil them until done. This way, they may “explode”, but that doesn’t matter with this recipe. ;-)
Bye, Sanne.
Soaking adzuki beans can take a long time, depending on the beans. That’s why I usually boil them over low heat with a lot of water, until they soften. That way, you don’t have to wait so long.
Is it okay if I store them at room temperature for a few days?
I wouldn’t.
If you plan to eat them over the next few days: Wrap the steamed buns individually in plastic foil and put them in the fridge or freezer.
To freshen them up ;-), put one moistened with a little water in a small microwave-proof container with lid (glass or ceramic) and “nuke” it for a few moments (thaw it first if frozen).
Be very careful when eating it then, the filling will be scalding hot!
Or steam them again, but that’s only worthwhile if you do that with a batch large enough to fill your steamer, one layer at least.
If you plan to prepare them beforehand: wrap them up like described before right after having them filled and freeze them. To steam them, just unwrap them, put them in the steamer a few hours before you need them, let them thaw and rise until they are as desired, steam them like freshly made.
Bye, Sanne.
I stored them as you instructed, and steamed them before I ate them and they were still fluffy! Thank you so much!
You’re welcome!
I’m glad I could help.
Bye, Sanne.
Hi Maangchi I love your recipes❤️ Could I use the parchment paper for bamboo steamers? I cannot find the same paper you use in your steamer.
Thank you
Yes, absolutely. I believe, unless they are made of cotton or silicone, the paper ones are all parchment material. They’re widely available on amazon or you can just cut-out a round shape from regular parchment paper. I ordered a steamer pot from amazon just to make this recipe but forgot about ordering the linings, so I’m just going to use the parchment paper I have on hand. Awesome! :)
I followed the recipe but my dough didn’t turn out sticky. It was stiff. What should I do? What happened?
Probably not enough moisture. Maybe add a little more milk or water?
I maded them today and I must say that for lunch they are too sweet for me and my wife ;) Maybe I added to much of rice syrup. My buns actually went bigger, they even rise much at steaming process :P But they are really filling stomach very fast, two buns and I’m full. Maybe next time I fill them with kimchi or put some bulgogi inside to make this dish more lunch style.
See full size image
Try them with sweet and salty BBQ pork. Just use a little filling. Very nice with an egg custard too.