


Koreans have their own unique recipes for garlic pickles, with each family having their own variation. While some may use split and skinned garlic, my version of garlic pickles uses the whole garlic bulb, and I typically make it during the garlic harvest season of May or June. The young garlic harvested during this time has a very thin outer skin that becomes chewable after being fermented for at least eight months. The resulting pickles are sweet, sour, salty, and crispy, making them the perfect side dish!
One of the benefits of this recipe is that you don’t need to store the pickles in the refrigerator, you can keep them at your room temperature. The process is very simple, we pickle the garlic in brine for a week and then disinfect the brine by boiling it, and then disinfect it again 2 weeks later. This is always plenty for me but if you see bubbles in your brine a few months later then you can boil it again to make sure all the impurities are gone.
Once the garlic has fermented nicely, to serve you just take out a bulb and slice it a couple of times. The juicy whole garlic pickle has a flower-like appearance and is sure to impress guests at dinner parties once it’s on the table.
During the spring garlic season in Korea, my friends and I used to visit an open-air market to purchase a large box of garlic, which we would then divide amongst ourselves. We would discuss the best ratios for ingredients like soy sauce, vinegar, water, and sugar.
To make this recipe, I use a 12-cup small earthenware jar that is the perfect size, but a glass jar can also be used. What’s more, my garlic pickles have a long shelf life. Even after being fermented for over four years, they are still crispy and flavorful, bursting with juice when cut. Overall, making garlic pickles is not only a delicious activity but also a great way to preserve garlic and enjoy its many health benefits.
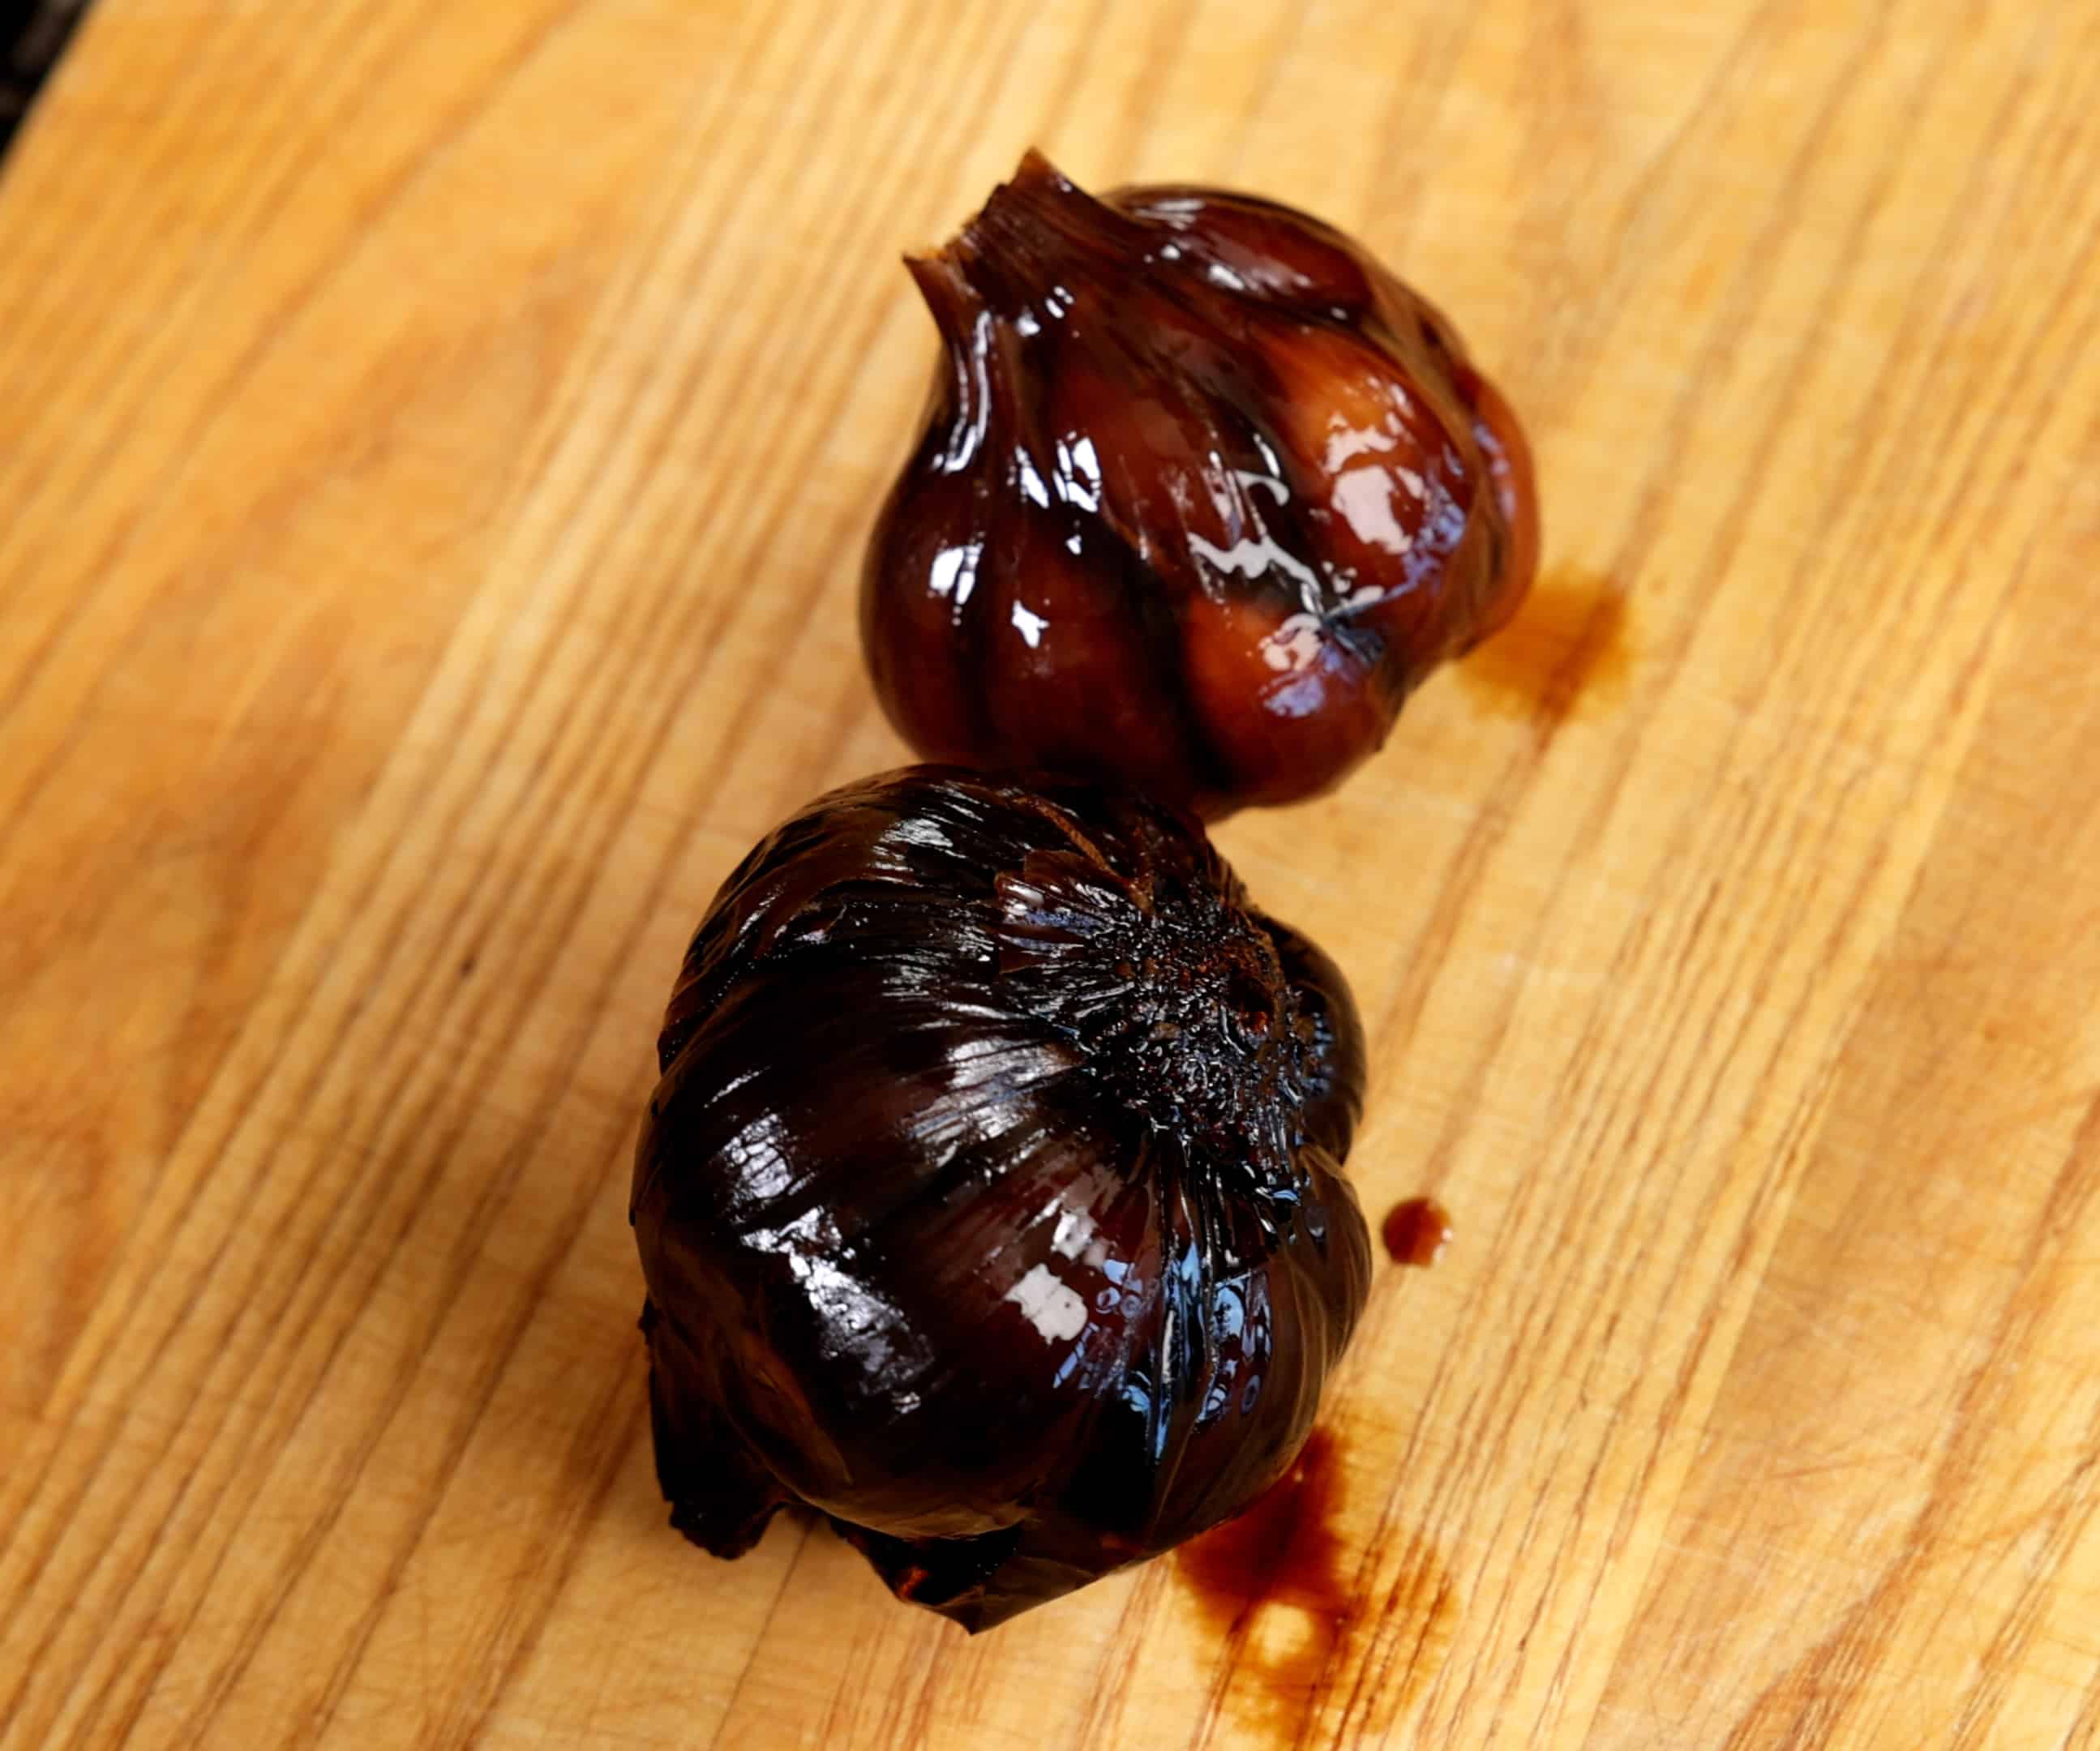
8 months old pickled garlic (top) and 4+ years old pickled garlic (bottom)
Ingredients
For 2 pounds garlic (about 24 medium sized whole garlic)
- 3 cups soy sauce
- 3 cups water
- 3 cups vinegar (white, apple, or rice distilled vinegar)
- 2 cups sugar (white, brown, or cane sugar)
- ¼ cup kosher salt
Directions
Prepare garlic and brine
- Remove the outer skin of each whole garlic, trim the roots, and cut off the stems.
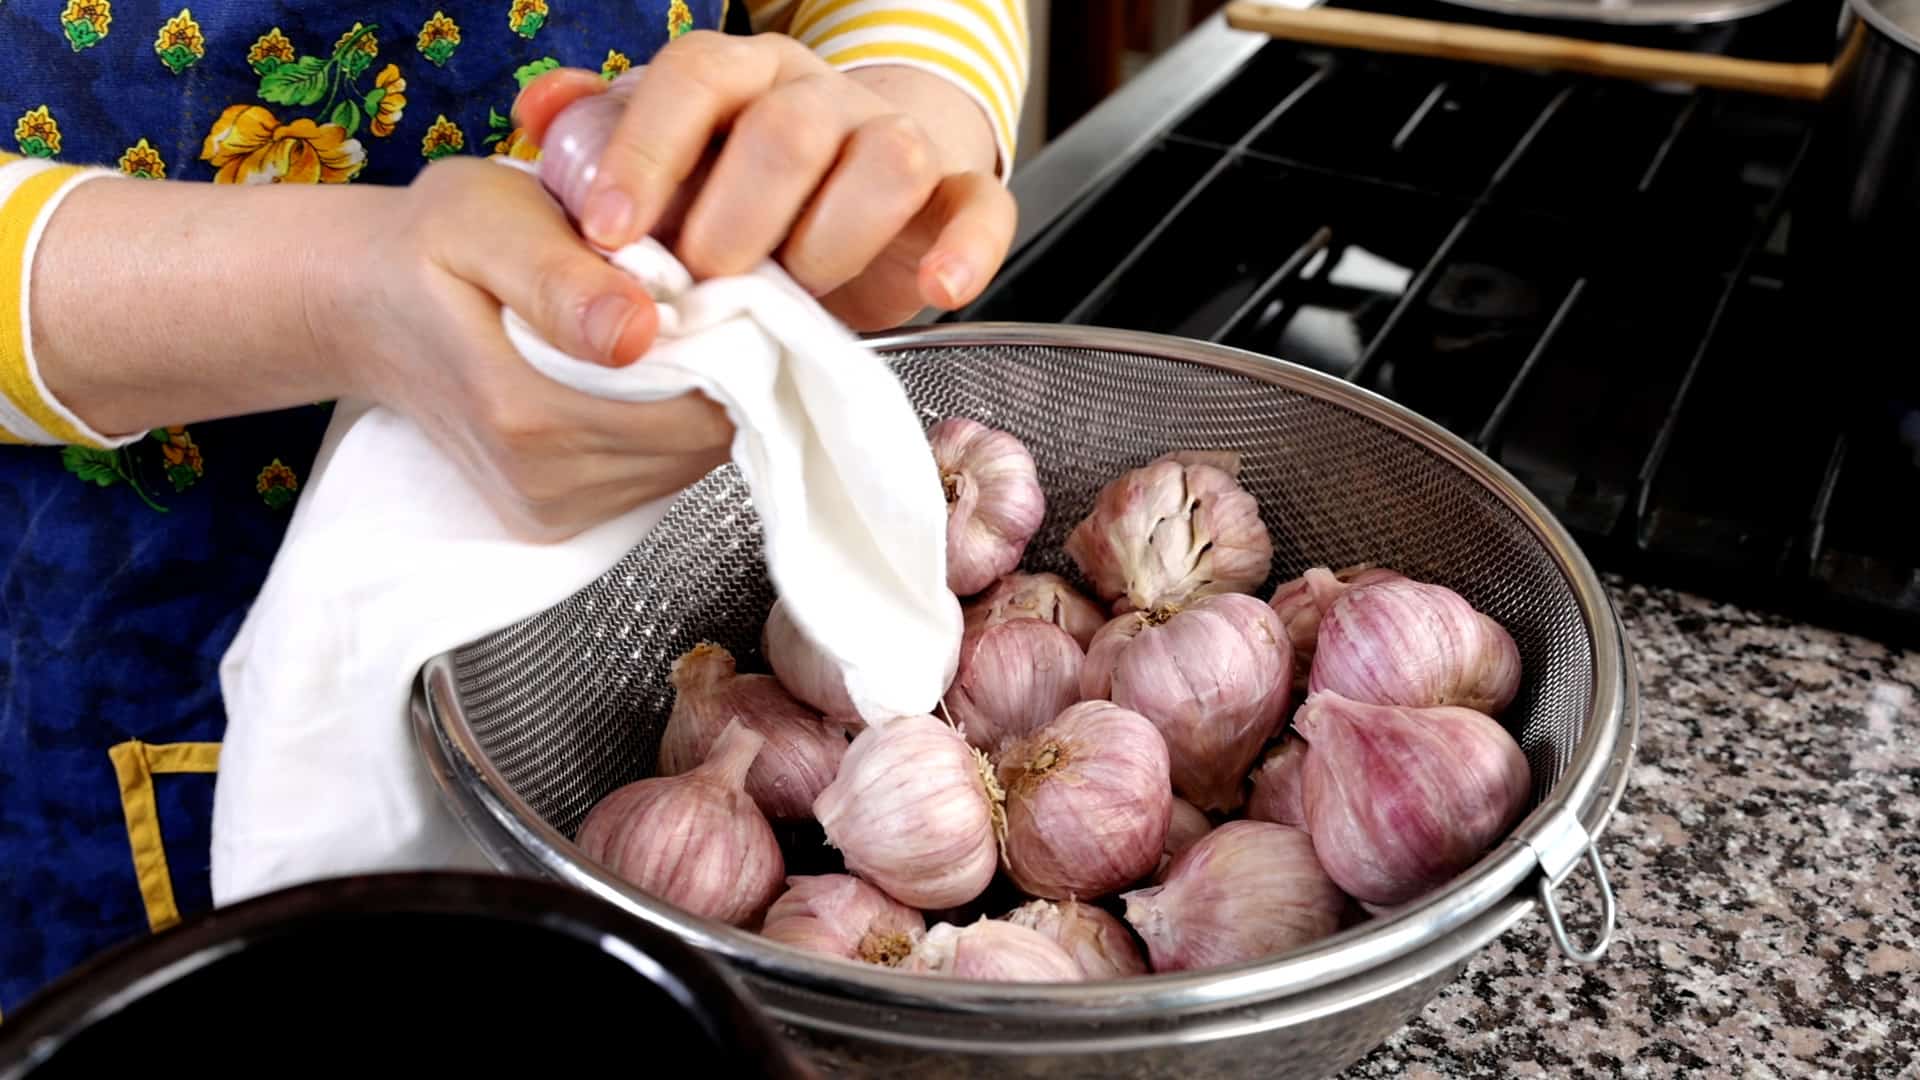
- Wash them under cold running water, brushing the roots with a kitchen brush. Rinse and drain.
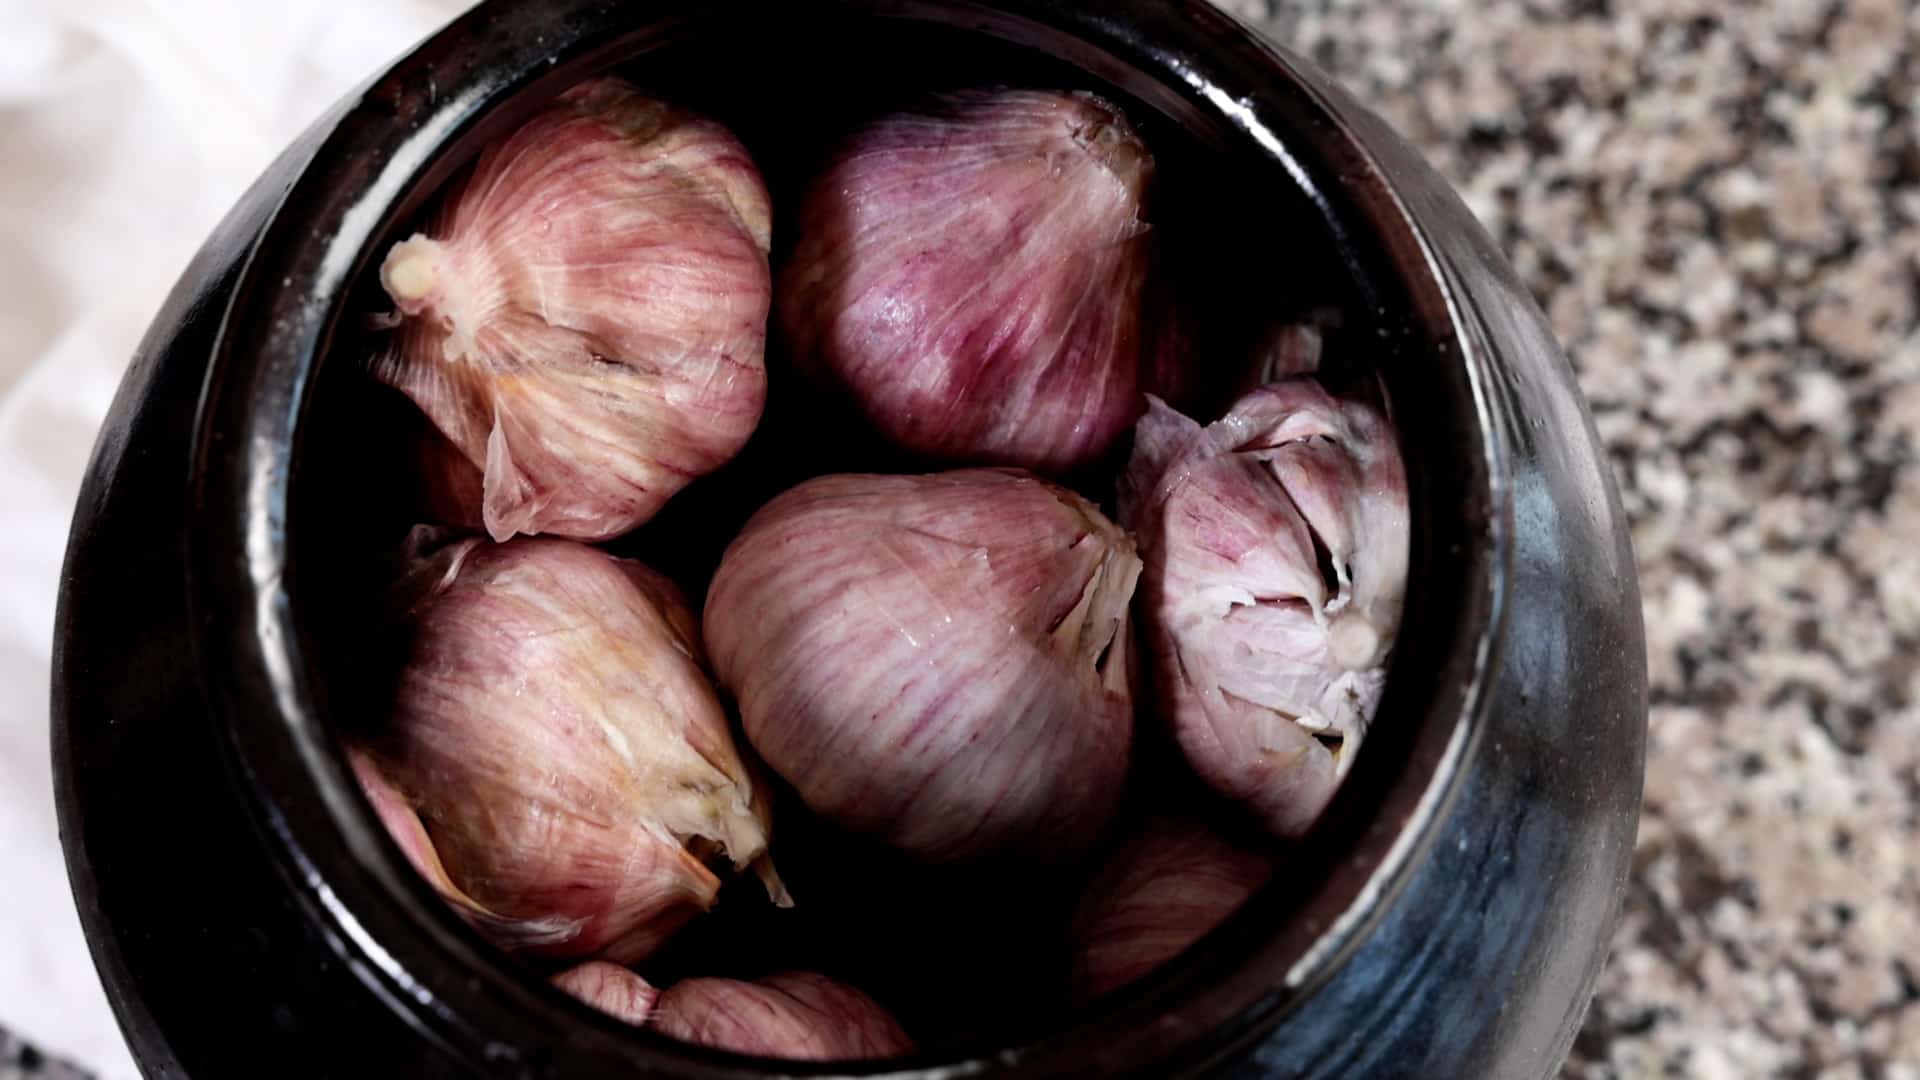
- Wipe off the excess water with a kitchen towel and add them to a 12 cup earthenware jar or a glass jar.
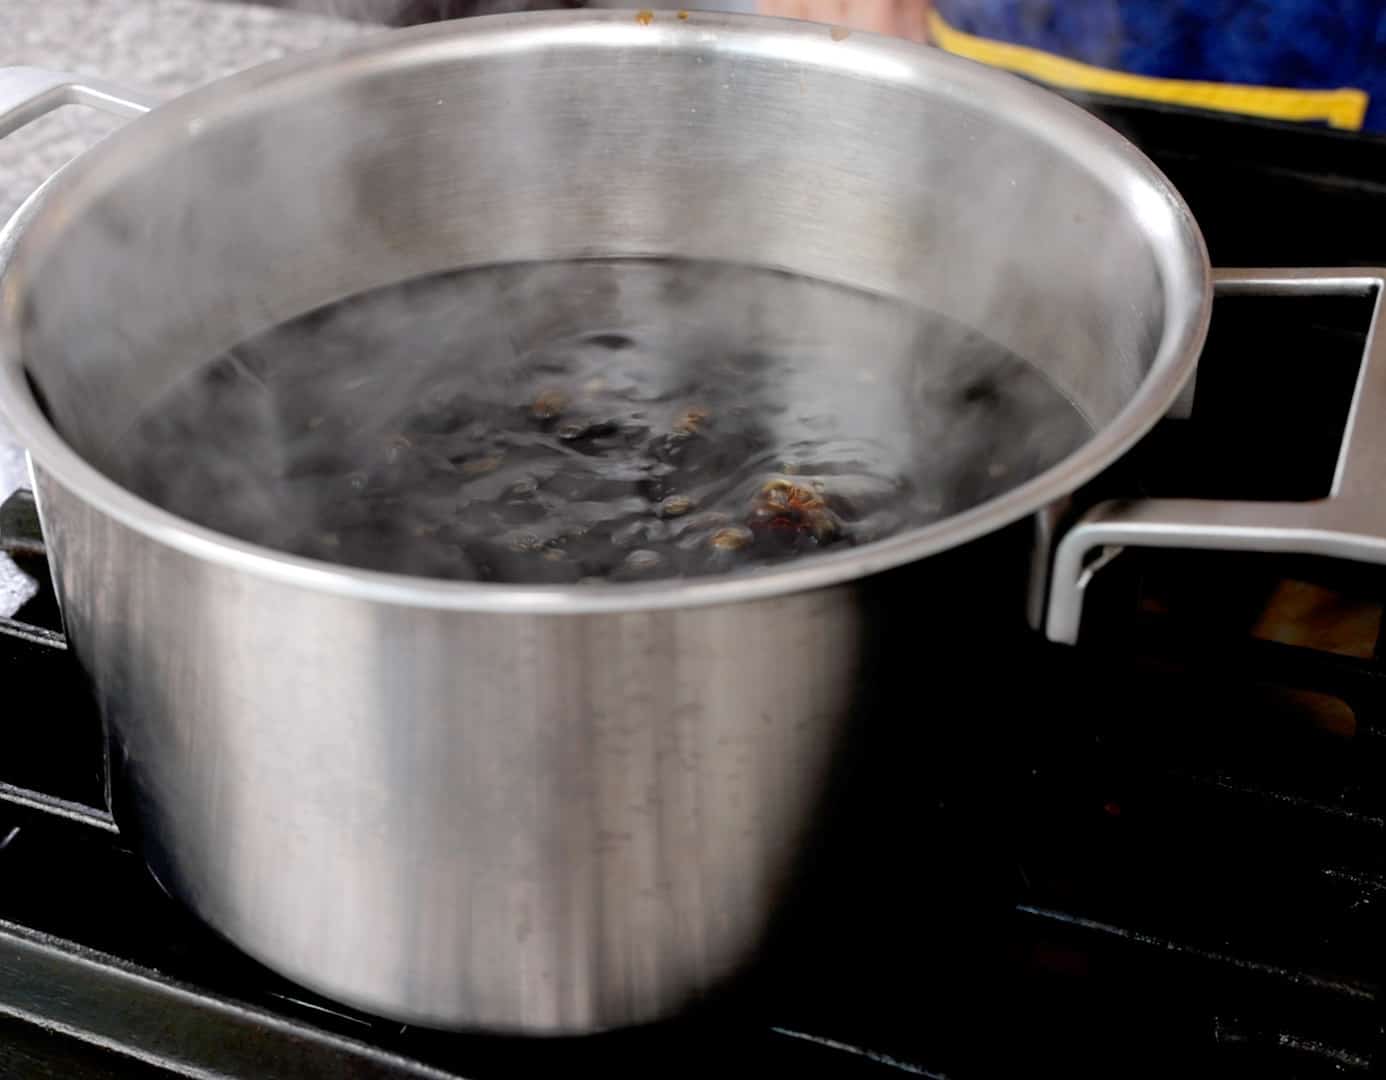
- Combine the soy sauce, water, vinegar, sugar, and salt in a large pot. Stir until the sugar and salt are dissolved. Then cover and heat over high heat until it reaches a rolling boil.
- Uncover and let it sit until thoroughly cooled down.
- Add the brine to the jar to the garlic in the jar. Reserve the leftover brine in a jar and refrigerate it.
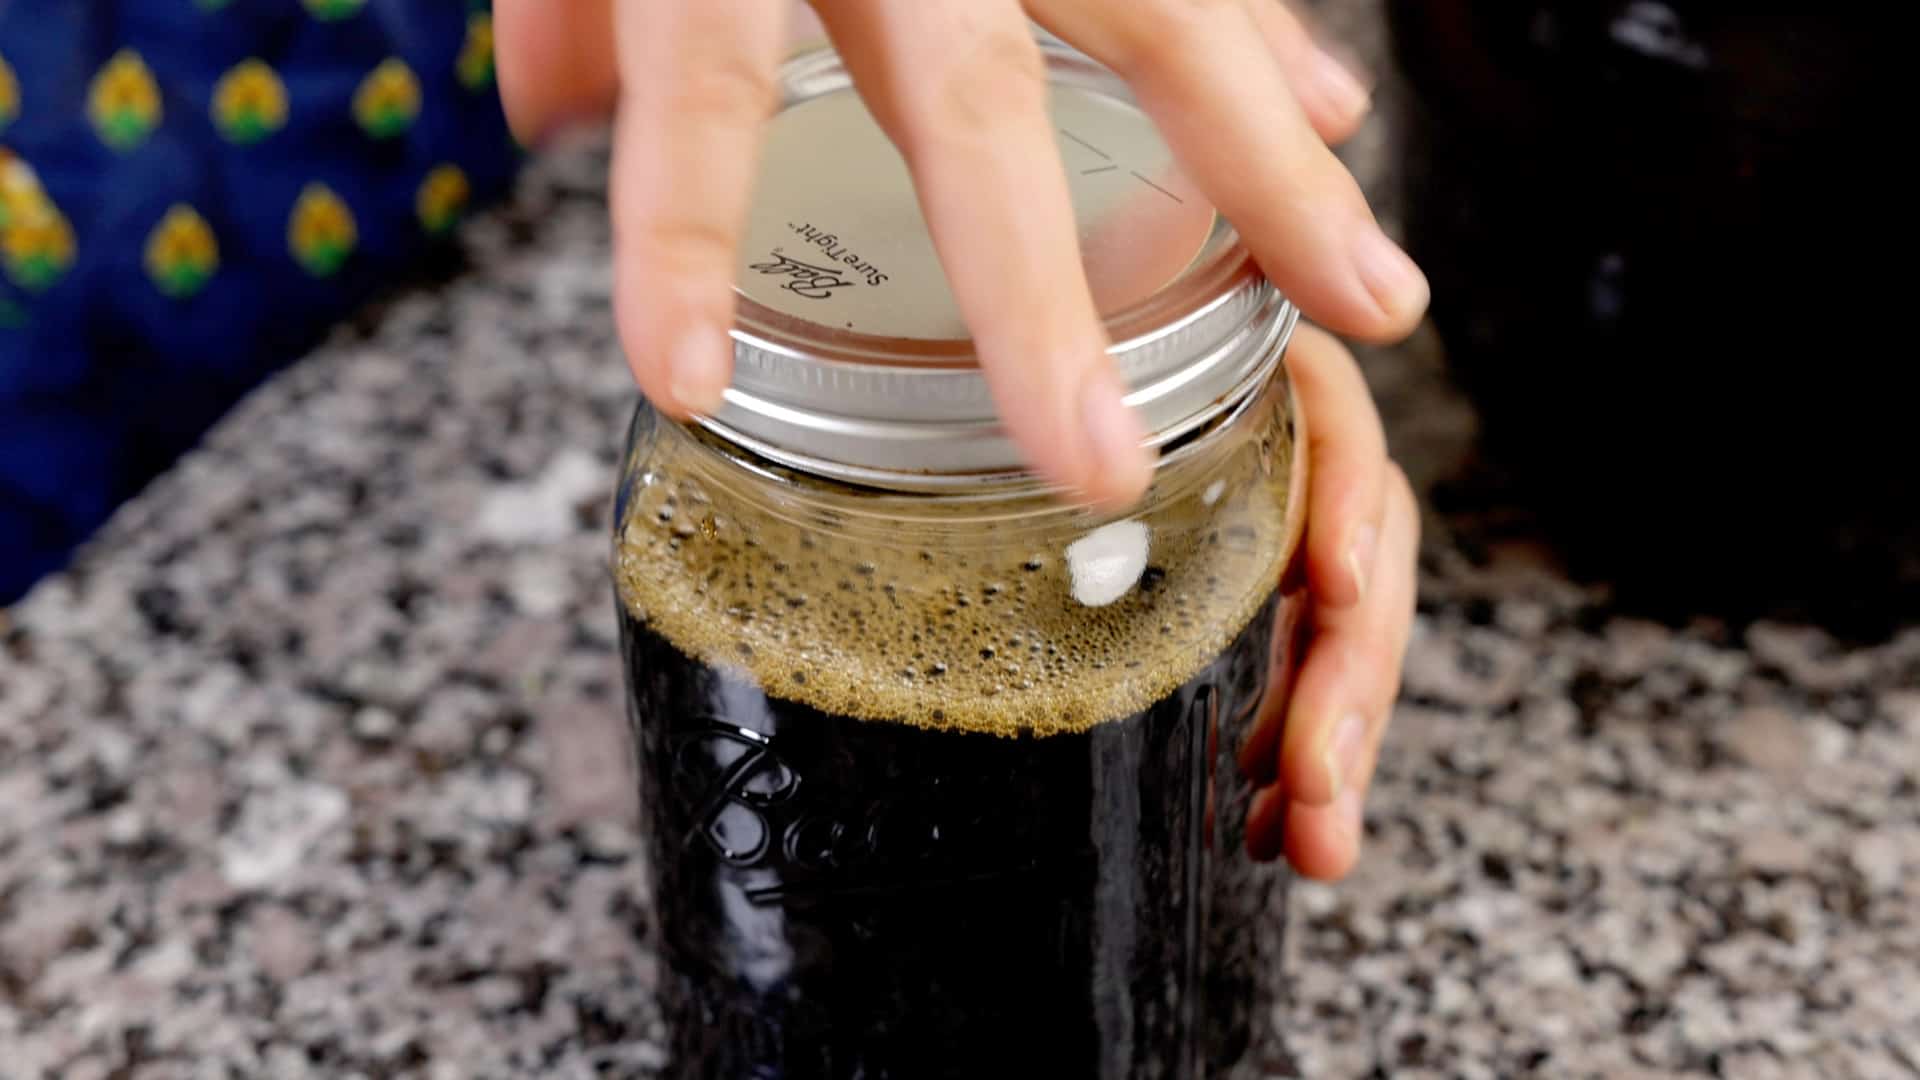
- Add the pickling weights to the top of the garlic so that they are totally submerged in the brine.

- Put the lid on and let it sit in a cool place in the house for 1 week.
One week later
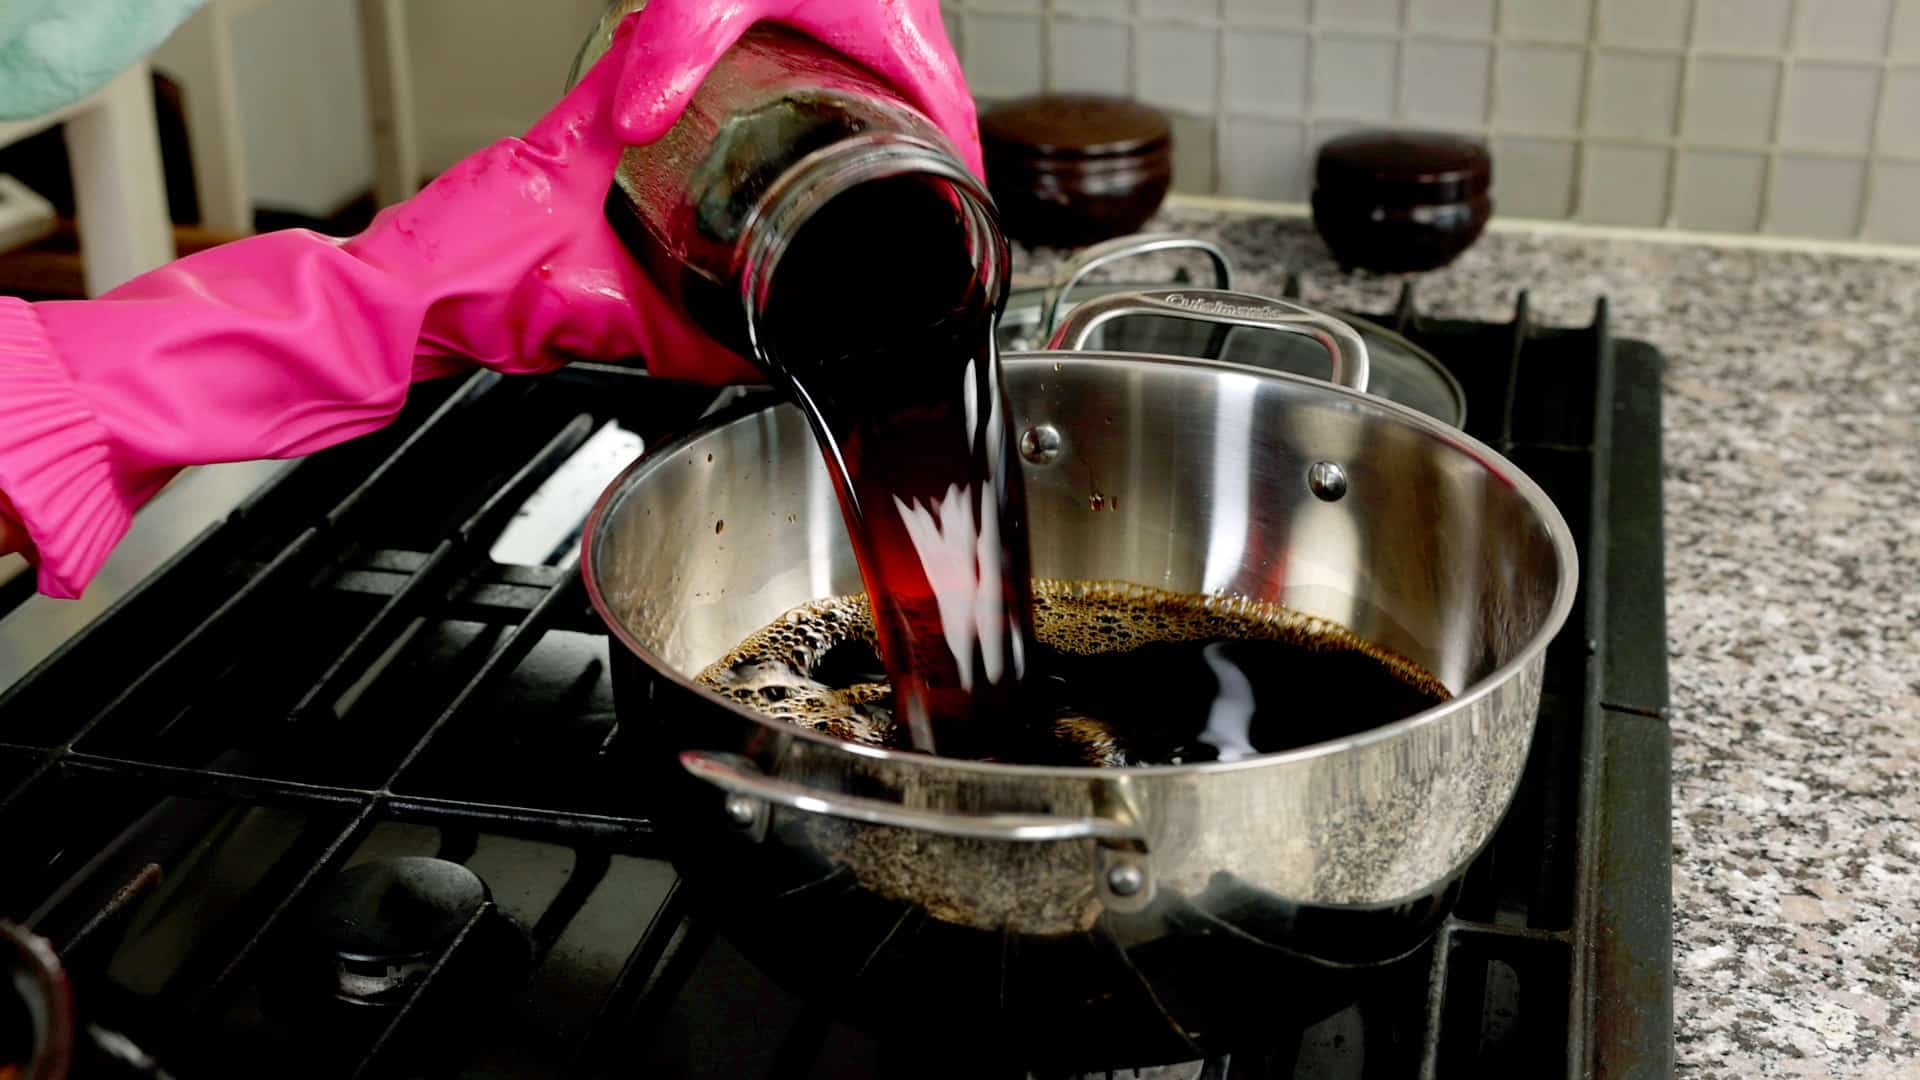
- Take out the pickling weights and put the garlics into a large strainer basket over a large heavy pot.
- Put the garlics back into the jar and add the brine along with the refrigerated extra brine to the pot.
- Heat it until rolling boil, for about 12 to 13 minutes.
- Remove from the heat and cool it down thoroughly, then add the brine back over the garlic in the jar.

- Add the pickling weights to the top of the garlic. Close the lid and let it sit for 2 weeks.
Two weeks later
- Open the lid and repeat the process 1 more time: draining the garlic, boiling the brine, letting it cool down, and adding it back over the garlic. When you put the garlic into the jar at this point, the roots should be facing down so the pickling brine can easily fill them.
- Let the garlic sit and ferment for at least 7 months and 1 week more, for a grand total of 8 months since you started. Then your garlic pickles are ready!
Serve
- Take one garlic and slice it a few times crosswise. Put the slices on a plate and serve with rice, soup, and other side dishes.


Buy this recipe's ingredients online
I really like Weee! they deliver quality packaged and fresh Korean ingredients to the continental USA. Cheaper and better than Amazon! Check them out!


Hi Maangchi,
Does the garlic need to be thoroughly dry before starting this recipe? I have some heads of garlic recently plucked from my in-laws’ garden, so they’re still not fully dried out.
Fresh, young garlic works best.
You have to remove any dry outer parts!
Hey Maangchi!
I’ve got a question regarding the onggi: what size is the one in this video (how many liters or gallons)? I would love to have an indoor onggi garden like you haha looks so nice and it harbours treasures of good food!
Also another question: can you use the onggi for long-term storage? all the recipes involving onggi seem to use it for fermentation, but afterwards, whatever was fermenting gets stored in the fridge? ( kimchi, doengjang, gochujang, makgeolli and rice syrup). What do you have hidden in your onggi garden, Maangchi? Maybe it will be revealed in the next video?
Kind regards
Mooshmoosh from Norway
OMG! I am doing my first boil and the kitchen smells awesome. I am very lucky that our local Chinese store sells garlic each year that is so fresh that the bulbs are still moist and not flaky. This going to be so good. Thanks for the awesome recipe!
I love your videos, thank you so much! I would like to try making the pickled garlic. Can I use kimchi pickling salt instead of kosher salt? Thank you!
Dear Maangchi,
Would you mind if I posted “my” version (based on a recipe from an older Korean cooking-book [1974]) using 픗마늘 (in season from March to May)?
Oh – I’ve already posted it as a comment to the request for it in your jangjorim-recipe thread.
:-)