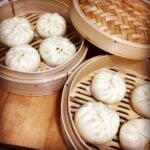
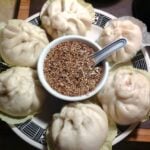
When I lived in Toronto, I learned how to make Chinese steamed pork buns from my Korean-Chinese friend, Ms. Bong.
Ms. Bong’s story relating to this food fascinated me for a while. She said:
“We used to make a large quantity at once, enough to eat for the whole winter. We kept hundreds of steamed pork buns in earthenware pots in the yard. The weather was so cold that the buns were frozen the whole winter, until we finished them. They were hard as stones the whole time. We ate them every other day, not as a snack, but as a meal. We used to bring some frozen buns to the kitchen, thaw them out, steam them, and eat them.”
I was overwhelmed by this story. I could picture them making the buns and keeping them in a huge earthenware pot. I could imagine them bringing some to their kitchen, thawing them out, and eating them with the whole family! Ms. Bong said they usually served them with rice porridge for a meal.
The small rolling pin that I use in this video was given to me by her. When she gave me the rolling pin, I was so excited that I ran to Chinatown to buy my steamer! The steamer has been one of my most precious kitchen items for 3 years. : )
I modified the filling to be more like a Korean style filling. Real Chinese steamed buns use ground pork, dried shrimp, chives, and blanched napa cabbage.
Yield:
16 steamed pork buns (6-8 servings)
Ingredients
For the dough
- 1 cup warm water (under 40° Celsius, or 100° F)
- 1 teaspoon sugar
- 2 teaspoons dry yeast
- 1/2 teaspoon kosher salt
- 1 tablespoon vegetable oil
- 3 cups all purpose flour
For the filling
- 1 cup chopped onion
- 1/2 cup chopped carrot
- 1 1/2 cup chopped zucchini
- 1 1/2 cup chopped green onion(or Asian chives)
- 2 cups chopped white mushrooms
- 1 teaspoon Kosher salt
- 14 ounces (400 grams) ground pork
- 1 teaspoon soy sauce
- 4 garlic cloves, minced
- 1 teaspoon sugar
- 1 teaspoon toasted sesame oil
- 1/2 teaspoon ground black pepper
- 1 tablespoon vegetable oil
For the dipping sauce:
- ⅓ cup soy sauce
- 2 tablespoons vinegar
- 2 teaspoons sugar
- 1/2 cup onion, cut into chunks
- 1 or 2 green chili peppers, sliced
- 1 teaspoon toasted sesame seeds
Directions
Make the dough:
- Combine the warm water, sugar, dry yeast, salt, and the vegetable oil in a large bowl and mix well until the dry yeast is fully dissolved.
- Add the flour and mix it with a wooden spoon for 1 minutes and then knead it for 2-3 minutes by hand.


- Cover and set aside in warm place until the dough doubles in size.
*tip: watch the video to see how you can make your dough rise faster!

- Knead it again for 1 minute to remove any extra gas and the dough turns smooth. Cover and set aside in warm place for 30 minutes.

While we wait for this to rise, we can prepare the fillings:
- Place the onion, carrot, zucchini, green onion, and white mushroom in a large bowl.

- Add the salt and mix it up by hand. Set aside for 10-15 minutes.
- Squeeze the excess water out.
*tip: using cheesecloth will make this easier. Wrap the vegetables in cheesecloth and gently squeeze the water out.
- Combine ground pork, soy sauce, garlic, sugar, sesame oil, and ground black pepper. Mix it by hand and set aside.

Let’s cook!
- Heat a large pan over medium high heat. Add 1 tablespoon vegetable oil and sauté the chopped vegetables for 2-3 minutes. Transfer them to a large bowl.

- Heat up the pan again, and cook the seasoned pork for 3 minutes until fully cooked.

- Put the pork into the bowl with the vegetables and mix it all up.

Now let’s make the buns:
- Split the dough into 16 smaller pieces.
- Take a few dough balls and put them on a floured cutting board. The rest of balls should be in the bowl with the lid closed, to prevent them from getting dried out.
- Roll out each ball into a disk 4 inches (10 cm) in diameter.

- Place a disk into your palm and add 2-3 tbs of filling mixture to the center of it.


- Lift the edges of the disk up around the filling, then press the edges together to seal the filling snugly inside the bun.

- Repeat with the remaining dough and filling, until you’ve made 16 buns.
- Put 6-7 cups of water in the bottom of a large steamer and place each bun on the rack.

*tip: Place cheesecloth or cotton cloth on the steamer rack before adding each bun. Baking cups also work well. When you place the buns on the rack, leave a 1 inch gap between them because they will get bigger when steamed. - Wait for 20 more minutes to let the dough rise even more.
- Bring to a boil over high heat, and steam for 20 minutes.
Make Dipping sauce:
- Combine soy sauce, vinegar, sugar in a small bowl. Add the onion, green chili pepper, sesame seeds, and mix it well with a spoon.


Serve with the dipping sauce, and enjoy!


Maangchi's Amazon picks for this recipe
It's always best to buy Korean items at your local Korean grocery store, but I know that's not always possible so I chose these products on Amazon that are good quality. See more about how these items were chosen.


![[OTTOGI] Premium Roasted Sesam...](https://m.media-amazon.com/images/I/41DixbNS9AL._SL160_.jpg)


Hi, Maangchi,
I really like this recipe. When you have to double the recipe, do you double the amount of yeast too?
I’m Korean from Uzbekistan and we make something similar at home, but we only use onions, meat and cabbage for the filling. I love your recipe, though I did use cabbage instead of the zucchini …
“When you have to double the recipe, do you double the amount of yeast too?” Yes, I do!
Nice meeting you! I’m interested in Uzbekistan style Korean food. Check this out. https://www.maangchi.com/blog/korean-uzbek-meetup
May I ask a question
what type of steamer should i buy for this recipe because there is a lot of steamers and I’m sort of confused. If you could help I’d be really thankful
Dear Maangchi,
Yesterday I tried to make this recipe, and it turned out perfect. Thanks to your easy to follow step-by-step instructions. My guests said that they were the best steamed buns (in the Netherlands they’re called bakpao) they ever had! So I am planning to make more later this week…
Thank you so much, they were delicious.
Hello Maangchi, do you know how to make Korean steam bun in the soup? I saw in Korean series call ”Dae Jang Geum”. Would love to know if you can show us how to?
Thank you from
Berlin
This looks so good! Can you share how to make this with the red beans inside instead?
Oh yeah.. and I also used coffee filters instead of cupcake holders, haha
This was delicious! I’m allergic to mushrooms so I replaced it with tubu and used ground chicken because I didn’t have enough pork meat. Thank you so much. My kids loved it so much they wanted to take it to school and my husband devoured 3! Do you have a recipe for this with the red bean insides?
do you have to cook the filling before stuffing the buns? I’ve seen recipes before where raw meat was stuffed into the buns and cooked in the steamer. Do you think it makes a big difference?
ooohhhh…. some call it bakpao? from where i’m at, we call this siopao (in chinese)
oh yeah? “bakpao? sounds like “are u busy?” in Korean: bapayo:바빠요? : ) siopao, bakpao, I will try to remember these words.
Dear Maangchi,
Hello!! My name is Vickie Mallari, I am 13 years old and probably the youngest to watch you cook. I have 50 videos from your podcast and they are amazing!!! I tried making these for my friend on his birthday but 3 of my friends hated them, oh well! I love your cooking show and you are amazing!! Thank you!!
From,
Vickie Mallari
Thank you Vickie! 3 of your friends hated your food? Some of my friends don’t like ethnic food, either. I know how you felt, but we can’t expect everybody to like what we like. That’s their choice! : )
Hi, this your recipes for the dough is the best .It’s the real old and classic dough that make me happy again and try to make my own bun with different things inside .Thankssssss
Do you know a good place to locate dry yeast in Korea?
In your written directions you do not mention the amount of water to add for the dough. In the video you say 1 cup!
Just thought I’d let you know because I printed out the directions to have in the kitchen and then had to come back to the website for that!
Thank you for pointing out the missing part. I appreciate it! It’s updated.
Thank you Maangchi!! I made it!!! I replaced pork with chicken because I didn’t have it with me at the moment and also i didn’t have mushrooms– so i replaced it with boochoo… It was my first time making any mandoo- and it worked!!!! SO delicious!! I’m so excited to make it again so i can make it look really nice- like yours! :D
yay! Congratulations! : )
Maangchi, do you know if there’s a way to make this dough gluten-free that actually works? I love these buns but I can’t eat them anymore.
I love this type of bun and have been having a lot of trouble finding them pre-made at the markets (tons of red bean buns but no Korean meat filled ones except for mandu), so with this recipe I won’t have to look anymore.
Love the sauce, btw…I’ve never seen one that had large pieces of onion and pepper like that. I bet it tastes delicious and can’t wait to try.
One thing I’ll probably add to the buns is cooked cellophane noodles, like the kind in japchae, because I want to cut down a little bit on meat. I think I remember eating buns with the chopped up, clear noodles in them from before, but I can’t be sure. I’ll let you know how they turn out. :)
Cooked cellophane noodles sounds great! Let me know how your steamed pork burn turns out later.
I just made this recipe this weekend and it was great. Definitely my new pork bun recipe! I wrote a blog about it too!
http://ikkin-bot.blogspot.com/2010/09/korean-pork-buns.html
yes, I know how you feel! Congratulations!
Could I substitute the pork with ground chicken or ground turkey?
yes, you could use ground chicken or turkey. Good luck with making delicious jjinppang mandu!
can i use ground pork in stead
Of course you can use ground pork, why not!
hey maanngchi CAnt U TEll ME WAth SOuld I BUY FOR A good food PRocessor like yours that u used its awsome please help AND THE song at 5:25 whats the songs name thank u
This is my food processor. I can’t live without it. : )
http://astore.amazon.com/cookkorefoodw-20/detail/B00004Y2MZ
I never believed I could make something like this– but I tried today (it took all day) and it was a total success! I can’t believe it. The only problem was that the 만두 stuck to the cupcake papers. Should I put some oil on them next time? I’m looking forward to making so many things from your website :)
I forgot to mention, I steamed them with my rice cooker and it was no problem. I could only fit 4 at a time though, so I made them in shifts… haha
could you tell me how to cook them in the rice cooker, please =)
Congratulations! : ) ” stuck to the cupcake papers” oh yeah? Mine was ok though.
Usually, I use a piece of aluminum wrap and not to use cupcake papers. Then, it is much more easy to take it out! Hope this help though
These look great! Provided my yeast proofs ok, I’m going to make some tonight. Question about how to freeze the leftover buns–should I freeze them before or after the final proofing? My guess is before, but I’m unsure. Thanks!
Freeze them after steaming.
I’m so excited for this recipe! I’m going to make it for my grandpa tomorrow! I might add some shrimp and napa cabbage to it though! You are so wonderful, I follow you on youtube but this site just totally adds so much more to sharing your recipes! Thank you!!!
I hope you get compliments from your grand father.
hello maangchi!
it look delicious! i wanted to ask if we can use a bread machine to make the dough, looks really hard to make using hands heheh
if we have not a steamer, what can we use instead of that?
I’m not sure about the bread machine. But if you have an asian rice cooker you can use that to steam the buns!
i have that one! :)
does it really work as steamer? lol
its amazing! thanks! ^^
yes, you can use your bread machine to make the dough.
Wonderful recipe, I would love this with shrimp…And I love your videos:)
We also have jjinppang mandu here but we call it Siopao – it has more meat, sometimes a big piece of chorizo and a slice of boiled egg inside. Although I prefer your recipe Maangchi, because it has lots of vegetables in it :D I just need to buy dry yeast and I can make these, yum! Thank you, Maangchi
Do u think i can use electric steamer for this buns ? And another question , can i freeze these buns after they have their fillings and all ??
I love your steamer , i need to find me one like that .. i don’t really like my electric steamer , but i can’t wait to try this buns !!
yes,I think an electric steamer will work well, too.
Freeze your leftover buns. : ) “We kept hundreds of steamed pork buns in earthenware pots in the yard. The weather was so cold that the buns were frozen the whole winter, until we finished them. They were hard as stones the whole time. We ate them every other day, not as a snack, but as a meal. We used to bring some frozen buns to the kitchen, thaw them out, steam them, and eat them.”
Just finished making the buns !! They’re so delicious ..Although i couldn’t make it as pretty as yours .oh and i definately needs to get a steamer like yours , mine doesn’t accomodate 16 buns at a time .. LOL . Thank you for your delicious buns recipe , maangchi ! Will be taking pictures shortly and sending them to you !
wow, so fast! I’m looking forward to seeing the photo!
OMG!besides hodeok this is my INSTANT FAVE NOW! your buns looks so perfect! and cute! xD and… yummy! :D
ill try this on weekend ;)
you are awesome maangchi! :D
haha, I think you are excited about this recipe just as I was when I learned this recipe for the first time!
awww.. lovely bakpao!! i hope i can make my own but i dont have any steamer =( ill buy one soon… cant wait to try this wonderful recipe. you are awesome maangchi
bakpao? I will call this bakpao from now. : )
gnamm right now they’re on the steamer =P
can’t wait to have a bite! =P
aww!! delicious!! i’ve just changed the green onions with cabbage, and it was delicious!! thank you so much!
omg, Congratulations!
Can you make the dough a day before and refrigerate it?
yes, it will be ok.
I am so happy you posted this! I cant believe how easy they are!
Thank you Maangchi!
oh, Does it look easy? awesome!
It’s like Baozi or Nikuman.. just d e l i c i o u s!!! :)
thank you very much, Maangchi
yes, you are right!
I love it! I like bakpao too.
They look delicious! i hope i can fit 16 in my steamoven :)
When I learned this recipe, my heart was beating vigorously because I was too happy! haha
Maangchi !! This is awesome tutorial .. we call this Bakpao in Indonesia , i will be trying this pretty soon ! your recipes keeping me busy in the kitchen !! LOl
yes, let me know how it turns out. : )